Showing posts with label hiking. Show all posts

Sunday, March 15, 2026

Adventures of 2025 in Images

Still far from complete but I feel like this is the bulk of what I'll post for now. Keep in mind I've added photos all the years in review from 2008-2024 over the last few months, so the album with never truly be finished. But either way, enjoy a little slice of my adventures in 2025!


Direct link to the Flickr album can be found here: 2025 in Images or you can click the highlighted links below each photo on the photo collage to see full size individual images. Order is left to right, top to bottom. So 1-5 is top row, 5-10 is the second row and so on.


1. Marshall on Hurricane, 2. Skiing with Marshall, 3. Deore Purgatory, 4. All That the Light Touches Is Yours..., 5. Love, 6. Moose River Madness, 7. Marsh and Sen, 8. Enjoying the Campfire, 9. Seneca Falls, NY -Cayuga-Seneca Canal, 10. Buc-ee's, 11. Ouachita Trail Single Track, 12. My name is Marshall..., 13. November 2025, 14. Memphis Zoo, 15. Memphis Zoo, 16. Finger Lakes - Erie Canal Trail Bike Tour, 17. Sweet Relief, 18. I'll Always Rembember Us This Way, 19. Erie Canal Bicentennial Bike Tour, 20. Mid-fat at the Lake, 21. Bikewhat....?, 22. Spring on the Erie Canal Trail - New York, 23. Marsh on Moonshine, 24. Seneca, 25. Preview to Heart of the Finger Lakes Bike touring, 26. Looking out at 2026...Let's Roll!, 27. Breaking Away, 28. The Road to Paradox, 29. Autumn sunset on Blue Mountain, 30. Mashall backpacking in the Adirondacks


1. October Roads, 2. Autumn bikepacking in the Adirondacks, 3. Autumn at the Lake, 4. 1991 Trek Multitrack 7900 on the Erie Canal, 5. Transition season in the Keene Valley -Adirondacks, NY, 6. Cup of Contemplation, 7. Adirondack Autumn Views, 8. Big Wheels Keep On Turning, 9. Camping with Dogs: Seneca, 10. The Road to Paradox Panorama, 11. Sun Beams Over the Northern Adirondacks Descending Haystack Mountain, 12. Adirondack Groads: Gravel bikepacking in the Northwest Adirondacks, 13. Aim and the Marshmallow Man, 14. Gully Piton, 15. Grass River Revival, 16. BCXC In the Western Adirondacks, 17. The Pyramid, 18. Father and Daughter, 19. Oooops.....!!!! (WATERSHED BREWING - GENEVA, NY), 20. Marshall and crew on the Crows, 21. Mountain Biking Vermont: Green Mountains Fall Foliage at Sunset, 22. Rollin out, 23. Sunset snowshoeing at Moreau, 24. Descending Sugar Hill into Watkins Glen, 25. Bikepacking: Hector Falls - Hector, NY, 26. Crooked Lake Ice Cream Company - Hammondsport, NY, 27. I Love New York - bike touring / bikepacking edition, 28. Ski Trail, 29. Overwatch: Backpacking in the Adirondacks, 30. Sunset after glow over the Northern Adirondacks (panorama)

Wednesday, February 25, 2026

Bone Bruises...Light isn't always right! (The Trap Dike)

(editors note: this has been sitting in my drafts folder for 14 years....time to unleash it, I'm publishing it with the current date but will archive it to Aug 1, 2012)


Group ascending the Trap Dike in the Adirondacks High Peaks. This is a Class 3 (with about 10ft of class 4) scramble


A few weeks ago I did a scramble in the Adirondacks (Trap Dike). I chose to wear running shoes because I knew the group would be moving fast and the approach to the start of the scramble was fairly flat and fairly soft on the feet. Moreover, I knew I'd be swimming, rather than hiking, the most foot unfriendly section of the hike in (Avalanche Pass).

That blue dot in the water is me swimming Avalanche Lake with my pack and gear in a drybag. I swam 400yds in under 10 minutes, and was dressed by the time the hikers arrived


However, I didn't really consider the descent, which of course is where the majority of the impact is on any hike. During the course of the ascent, I switched to my sticky rubber approach shoes (sort of a climbing shoe merged with a running shoe). These are a little small on me, but work perfectly for the ascents, where a tighter shoe offers more control and climbs better. These shoes are very thin to begin with, and my foot got tender under the ball on the ascent of the 3rd and 4th class terrain, but the superficial hot spot turned into deeper pain by the end of the 13 mile day. 

What went wrong? The bottom line, I was carrying 15-20lbs on my back, I was descending a fairly typical northeastern rock hop, I didn't have my trekking poles and I was wearing running shoes designed for light duty trail running on easy trails. 

The end result, a bone bruise on the ball of the foot. I followed up this with a 20 mile weekend in the mountains, and a 30 mile weekend on two of America's toughest trails. Each hike it became more evident that what was wrong wasn't just superficial. 

I admire people who are svelte and nimble enough to get away with ultralight shoes, while hiking along with little or no equipment, but that isn't me. I'm always prepared on the trail, I'm self sufficient. Besides the only way to prepare to carry 20, 30, 40, 50, 60 or more pounds in the mountains is to load up and go hiking. 

Nevertheless, it's ironic that I have solved the issues of my musculoskeletal inflammatory/overuse injuries in the last 8 months by eating a moderately to highly anti-inflammatory diet, only to be back on the injured list with a bone bruise I could have avoided. 

Hopefully someone reading this blog can learn from my own stupidity, which is definitely not that off the mark of what we are fed on a daily basis from the media gurus of the mountain world. After all, just because magazines make a fortune telling you how everything you own is heavy and overbuilt and should be replaced, doesn't mean it is. Sometimes a few extra ounces or a little extra bulk or a little more durability is worth it in the long run.


Tuesday, July 6, 2021

Tarps are Integral to Camping Enjoyment

Independence weekend camping setup


The lowly polyethylene tarp, not as popular as an Ez-up or as cool as a nylon parawing. But on a rainy weekend absolutely dry and makes rain nothing more than an afterthought. The plastic tarp is a perfect example of function over form. I used to think these were trashy but it's really all in the setup. I noticed most people using poly tarps sort of last minute buy them with no knowledge, plan, poles or sometimes even proper line. I own a nice wing and a nice rectangular silnylon tarp that I take backpacking and canoe camping, but I realized that nice nylon (and don't even think about silnylon) aren't really designed for the rigors of car camping or even paddle in and camp (vs paddle and portage) canoe camping.  Rigors? Being packed wet, sitting in the sun for days on end, and just generally no need for a light packable tarp unless you are using Smart car as your vehicle. 

Colvin in Dolly Sods Wilderness. It mostly rained overnight on us, but the gear pile was completely dry under the well setup silnylon tarp. We only had to spend about an hour under it over 3 days. 

You will miss out on your friends commenting how nice your MSR or even Kelty Noah's tarp is compared to the brown heavy duty polyethylene (every time I pull out the Noah's Parawing, people comment on it and it's all of $70 new), but unless they are paying you to replace it every year (depending how often your camp, and if you camp infrequently enough it doesn't matter save the money and buy a plastic tarp), just shell out $50 for 2 polys once every 5-10 years. In fact, you can buy enough polys, high strength/low stretch cord, and tarp poles to cover the biggest site in the world for less than the cost of one big backcountry tarp (before poles). 
Enjoying the fire from the cover of the tarp. In total we had 22x10ft of coverage. Including access to the fire. 


While I am a big fan of the ridge line for a lot of reasons, it's not the only setup. The big advantage of the ridge line is its like a cordalette/webolette in climbing, it gives you a master point to work off. With proper line you can hang clothes, lanterns and even multiple tarps stacked (shingled) across a site or multiple tarps separate. I highly recommend learning about climbing pulley systems. Sure you can buy some cam straps or some friction devices. But a 2:1 or 3:1 system or even a simple munter with MMO will get your ridgeline ultra tight. You can do all this with some quick links or the cheapest (real) caribiners you can find. No need for a ton of gear. You don't need pulleys or progress capture devices. 

Wednesday, May 23, 2012

Food For Thought: Fueling the Great Range


For my birthday in June, I will be doing the Adirondack Great Range. The hike is currently ranked number three on Backpacker Magazine's 10 toughest day hikes in America. The list is ever evolving, and sometimes particular hikes -such as the Devil’s Path or Presidential Traverse- get dropped off, but the Great Range has been a staple on the list for years.


I got to thinking about what I will need to fuel me for the 20+ mile 20,000ft gain and loss day. I estimate I will need around 8,000-10,000 calories of total energy, though, I obviously won’t need to eat 8,000 calories due to my own endogenous fat stores. Not to worry, I'm not making fun of myself, even a very fit/extremely lean person has enough body fat to run a few marathons without additional fuel. This is precisely why I consider my “alpine gut” a survival tool.


Just like any non standard diet, being wheat, gluten, grain, soy and (generally) processed food free does pose some challenges.  So, the goal of food I bring is something that keeps me burning endogenous fat and feeling strong, but also keeps me satiated and my stomach from getting upset.


Since I have also been leaning towards the ketogenic (high fat, adequate protein, low carb) end of a diet spectrum for some time, consuming only about 100g of net carbs -sometimes as little as 40 to 60g- per day out of 2500-3500 total calories I don't need to bring a lot of carb laden foods. As a result, I should be able to perform much better without the need to eat a lot of carbohydrates during the day. The reason, of course, is that the machinery to burn fat as a primary fuel source is already in place.

A benefit I have already seen, recently, while on a fairly hard hike (13.5 miles + 4000ft gain), where I only consumed about 600 calories all day (including only 8 grams/42 calories of carbs), was that I never felt hungry or like I was crashing. 


Perhaps a pertinent example was this past weekend, I did just under 5000ft of gain in 7.5 miles, which is an effort ratio of 3.73:1, in comparison the Great Range is  about 2.8:1 (both ratios are versus flat land hiking). I estimate that I only consumed about 750-1000 calories while hiking and was strong right to the end, with no hunger, crashes or weakness. In fact, in spite of the extremely warm weather and intentionally going into the hike tired from hard workouts the previous two days, I either set or matched personal best up both trails, which are among the steepest in the region. So, even pushing the edges of the fat burning heart rate zone, I never bonked.

Although I could just go bonkers and carb out for a day, carbohydrates have a lot of negative effects when burned as a primary fuel source in athletes. These include inflammation, which is a big deal for a guy with two lumbar disks approaching their second decade of degeneration. But even a healthy person will recover much faster by simply removing acidic trending sugars from their diet. A more immediate negative of carbohydrate rich foods is blood sugar variations. By avoiding sugars, I avoid the spikes and crashes associated with blood glucose levels. Being on a more even keel throughout a long day should have some psychological benefit.

Since I’m endurance hiking in a low heart rate zone and always in a fat burning state of metabolism, there really isn’t a need to vastly change my nutrional intake from what I eat on a day to day basis.

Well, at least I hope there isn’t. After all, this is an N=1 study and I’m the guinea pig.

The following is my list of high calorie ketogenic promoting foods, along with some protein,and some comfort carbs that can be somewhat easily packed for a day hike. For the Great Range hike, I won’t be taking everything on this list, but it’s a good reference of options for future hikes of this difficulty. I included a little blurb of why I would take each item:


  • Coconut oil/MCT oil (a great source of easy burning fat calories, coconut oil is about 62% MCT, so it is a cheap way of getting expensive MCT into your body)
  • Dark chocolate (85-90%) (an excellent mix of fats, protein, carbs, fiber, and antioxidants. Aside from melting, almost a perfect hiking food)
  • Almond or hazelnut butter packets (calorie dense, mostly fat and protein, my replacement for sugar based energy gels...brand name I prefer, Justin's)
  • Pumpkin and sunflower seeds (calorie dense, mostly fat, high source of magnesium)
  • Raw almonds (calorie dense, something crunchy, same as the above nutrients)
  • Foil packed tuna, salmon or sardines (good protein source, almost real food)
  • Beef jerky (salty, chewy, almost required for a day on trail, protein dense)
  • Frozen guacamole packets (depending on temps...high in fats, calorie dense, can be sucked down on the move...brand name is Wholly Guacamole)
  • Chia seeds (in a gel form or mixed into coconut milk...an excellent mix of fats, protein, fiber...but they stick to your teeth for those summit photos)
  • BCAA’s (branched chain amino acid tablets or powder, these can be used as fuel and are necessary for endurance activities lasting more than a few hours, they will prevent your body from cannibalizing itself to get the amino acids needed for long duration endurance)
  • Canned coconut milk (good source of fats, high in MCTs which are a great source of energy, powdered option is available, but with sugar added, can be dumped into a Nalgene before starting to avoid lugging a can around. Ideally it should be kept refrigerated, so don't let it sit out of the can too long)
  • Powdered Coconut Milk (definitely should be avoided when possible, instead of 100% fat content, it's is about 80-90% fat, with a good amount of added sugar, but definitely an option)
  • High quality whey protein powder (don’t buy the junk at big box stores...mostly as a addition for coconut milk, but full of amino acids)
  • Boiled eggs (a complete protein source that is somewhat hike stable)
  • Boiled/baked potatoes (starchy carb, with a little salt on top a great trail snack, real -solid- food)
  • Turkey breast and goat cheese in a nori wrap (mmm, real -solid- food early in the day...downsides, low trail life)
  • Oat based granola bars (sort of wheat/gluten free, complex carbs, something different...consider it a comfort food)
  • Kind bars and Rise Bars(the almond and coconut Kind bar fits in with a ketogenic snack profile, plus a few carbs....the Rise Bar has 3 ingredients, Almonds, whey protein, honey; but like a Kind bar is not quite ketogenic and contains 20g of carbs per ~3oz bar)
  • Cocochia bars (lots of fats, some protein, and a negative net carb profile, almost perfect, too bad they are pricey and hard to find)
  • Homemade candied ginger with or without 90% dark chocolate coating (definitely not ketosis promoting, but ginger has more digestive enzymes than just about any single natural product on earth. It can cut gas, bloating, and an upset stomach. Plus, it has strong anti inflammatory properties. Oh and it tastes good!)
  • Coconut water mixed with green tea (a good way to replenish potasium, and the catechins and flavinoids in green tea are anti-inflammatory. The small amount of caffeine can offer some energy boost, but is probably insignificant to anyone who regularly drinks caffeine. Coconut water contains about 20g of sugars per 12 ounces, so this is definitely not a no sugar drink. It is, however, a much better alternative for those hiking slow enough that solid food is the primary source of calorie intake) 
  • Carrots and broccoli (both of these have a decent trail life and are pretty durable when stuffed in a pack, only downside is they are a little heavy in terms of calories to weight ratio. Eat them early in the day to shed the weight) 
  • Beanitos bean and flax chips (this is one of a few areas where I diverge from a Paleo diet, I think properly processed legumes are generally positive in moderation, and Beanitos are a great example of that. Salty -but not too salty-, crunchy, packed with energy and plant based proteins. They are low glycemic load, and have absolutely no corn or wheat in them. )
  • WATER (as Dr. Stacy Sims makes clear, you can recover from low blood sugar but not from dehydration
  • S! Caps (Reading the book "Waterlogged: The Serious Problem of Overhydration in Endurance Sports" by Dr. Tim Noakes has really opened my eyes to the LACK of need for electrolytes under normal drinking conditions. However, when hiking we don't always get to "drink plain water to thirst" as Tim Noakes recommends we do. More often than not when hiking, we are drinking as much as we can at water sources because they are few and far between. S! Caps are only used to help move water from the stomach to the body and avoid sloshing around in the stomach, and to avoid potentially deadly hypernatremia when I am forced to down large quantities of water at water sources)

Happy hiking! 


Tuesday, February 21, 2012

A postmortem to Winter 2012


High Peaks from West Crane Mountain
January views of the High Peaks from the summit of West Crane Mountain. The photo is deceiving, as there was only about 7-12in of snow on the ground, much of which melted in the following days of warm rain.
 
March and April are historically the biggest snow months at elevation in the Northeast, and over the last few years winter hasn’t really stuck around until Presidents Day weekend, chiefly because of arctic highs forcing moisture snow) south into the coast and southern mountains. However, unlike this year, we’ve had a few false starts in those years. Plenty of snow, then a warm rainy spell with it's accompanying meltout. Enough that snowshoes and skis would have seen some justified use by Presidents Day, even if skiers and climbers weren't completely happy with conditions. 

This year, despite snow in the High Peaks and lower elevations right on schedule, it’s been pretty much shoulder season conditions since the start. It hasn’t been typical Northeast extremes keeping us in a state of perpetual November, just consistently mild weather. No record highs, but lots of 40 degree days with rain.

Looking at the climbing logs, it looks like it’s been a decent ice season for people putting up free climbs I couldn’t aid with a bolt gun. Some very ballsy and serious routes have gone up all over the Northeast. But Scottish mixed climbing has existed in conditions like this for decades across the pond, even if it is just now making a renaissance in the Northeast USA.

Skiers, on the other hand, haven’t had much to choose from. Unlike ice climbers, skiers -as a general rule- don’t get masochistic pleasure from finding the worst possible snow conditions and skiing.

While I’ve gotten a few trips out on ice, to date I haven’t actually needed my snowshoes. Granted, I haven’t needed them largely because lower elevation conditions are so poor I just haven’t wasted the fuel to get to the North Country’s 1000m+ elevations where snow can be found.  Uncharacteristically, I’ve yet to take a trip to Vermont or New Hampshire either. Often they have better conditions at various times of the winter. In the Adirondacks, above 2000ft there begins to be some sign snowshoes could be necessary, and I hear wonderful reports of snow upwards of 20-30 inches at 4000ft.

I haven’t really needed my winter gear at all. It’s been mild enough most days that I’ve worn my base layers and soft shell pants. Other than wearing my insulated boots because they are required for ice climbing/steep crampon terrain, I haven’t needed those either.

The lack of snow also has meant my camping gear has pretty much been mothballed. I love snow camping and winter backpacking. Pound out a perfectly flat tent pad where ever you choose, and sleep like a king in the quietness of a forest sound proofed by fresh snow. Camping on the solid sheets of ice that has replaced snow cover or the forest floor is a lot less fun.

Crampons, or rather the necessity of crampons, are a completely different story. These are standard gear from car to summit and back during 2012. Even in the Southern Adirondacks, where there was almost no snow at all on Super Bowl Sunday, we needed crampons the entire two miles back to the car, hiking on a moderately graded low elevation trail.

The most depressing fact is that looking at the NOAA CPC long range data, I can’t say I am particularly optimistic winter is going to start anytime soon. NOAA says that we will continue with above average temps into April, along with normal precipitation. Neither of these factors scream big snow systems or extended cold.

No doubt we’ll get a blizzard in April to muck up spring hiking and rock climbing season. Other than that, I don’t see our recently historic trend of 8 grand weeks of winter beginning in late February.

I suppose the silver lining is I didn’t fork out $220 on those Tubbs Flex Alps I’ve been eyeing since last winter. Maybe I’ll score a used pair over the summer for a bargain price. I’ve also driven 75% less than a typical winter, which is good for the wallet, good for the odometer, and good for the environment.

All that said, I like living in this part of the country because of our four “over rated” seasons -as Left Coasters and Gulf Coasters like to put it. So no matter what the benefits, it still sucks to completely miss out on the most unique of those seasons.

Winter 2012, you had so much potential, but you never really stood a chance in this cruel world!

Tuesday, October 18, 2011

Whiteface Ski Slides, Bananas Gone Ape Poo

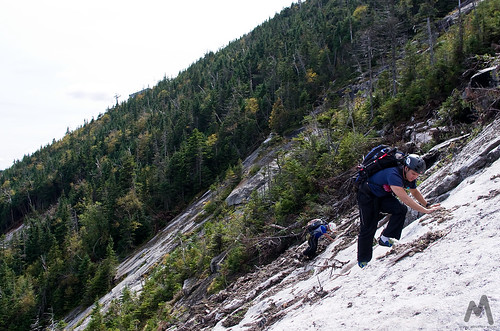
Ascending the lower slabs of Whiteface Ski Slide #3
Traversing across the upper section of the lower slabs of Whiteface Ski Slide #3.


I once staked my own path to a Christian heaven arguing the absurdity that animals couldn't go to heaven. Because my confirmation teacher was unable to provide any meaningful proof he was more in the know than my own principles, it actually led to me dropping out of confirmation before my 3rd and final year. Anyone can make up a story, and in mine, dogs do go to heaven, and if not, they just become worm food like you and I!

So if I was correct so many years ago, Caney was looking down on us Saturday with a big smile on his face, saying, "how do you like those slabs now." Karma is a cruel bitch, especially when you blindly question the commitment and effort of those who have done what you have not.

A few months ago, George questioned how tough climbing a 5th class slab really could be. "What does it mean to climb a slab", "If a dog could do it, it can't really be climbing," -can it? "Dogs can't actually rock climb." As if rock climbing only involved the vertical pieces of plastic and gri-gri's found in your local gym! Of course it burned me up, mainly because till that point (and till this day) George had never climbed a harder route than Caney. It also burned me because that dog logged more vertical with me than any two humans combined and never put me at risk once, never quit on me, and always impressed me. Even days before he died of cancer that had spread to his spine, he left me thinking how could a cute little 50lb fur ball possibly be that insanely tough. Add in the fact George didn't really understand what exposure was and how it changed everything about a climb, and I was starting to steam on the summit of Slide Mountain on that May Day.

Caney had freakish technique coupled with the arrogance (confidence) of an elite climber, but he also had no fear of heights, exposure didn't scare him. It made no difference to him if we were 10 feet off the deck or 1000ft. It was climbing and nothing more. So, it was ironic that on Friday morning as I started to pull away for the Adirondacks, I went back into the house and grabbed my dog tag that memorializes the best trail canine ever, and Saturday was for him!
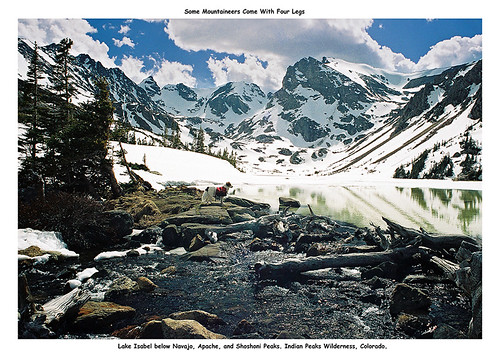
Caney At Lake Isabel
Caney before we entered the IPW and spent several days climbing and descending the glaciated peaks in the background.


What plans...

We spent about 3 months planning for the Trap Dike with a MacIntyre Range traverse. A really solid day that bagged five 4000ft peaks, and had Great Range like elevation changes, mixed with semi technical climbing. If you are going to put it all out for a single day of hiking, that would be the trip I'd do!

Then Irene came, the High Peaks closed, roads closed, the Trap Dike and Colden were among the many slides that grew or were entirely new in the Adirondacks.

Much meticulous planning down the drain. Still, my partners wanted to do something "technical" or as they put it, "the more technical the better." With Giant and Dix Wilderness closed as well, my eyes turned to Whiteface.
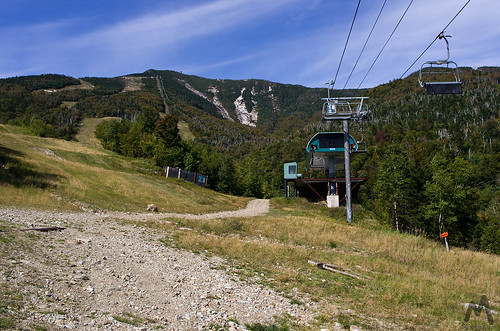
Slide bowl and summit
Slides and summit from the ski slopes.

Though, I personally thought the Dix Range and Macomb Slide was perfect for slide climbing virgins, Whiteface was open for business immediately. To me, it made more sense to plan for the most likely definitive option. Besides, with the exception of Ski Slide #1, most of the slides are rarely climbed. We’d be doing something that not a lot of people do very often, a real adventure. So while I was certain that the Dix and Giant Ranges would open shortly, I decided the bigger adventure would be Whiteface!


Men don’t do 2nd class slides...
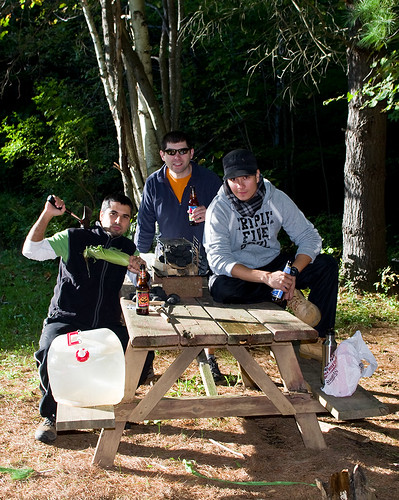

Celebrating success!
Proudly displaying our redesigned grill.
Ironically, while gearing up at the Whiteface Ski Center parking lot, a group of 3 or 4 guys asked us what the easiest slide was. I commented the far left side, Slide #1, is the one you want, but mumbled under my breath (jokingly) that real men don’t do 2nd class slides. John and George laughed with me!


Aim, Colvin and I checked out Whiteface Ski Slide #1 on a recon mission a few weeks ago. Ski Slide #1 was definitely not "technical." It was mostly Class 2 climbing, with cruxes in the 3 range depending on your route selection. Even accounting for the fact we were climbing it just days after Irene dumped up to 8 inches of rain, the wetness just made it a little more scary, but not significantly more difficult. For the purposes of our more technical trip, it didn't fit the description of what my group was looking for. Slide #1 is perfect for dogs, and girls with a fear of exposure, but not a real adventure in the mountains for 3 grown men.
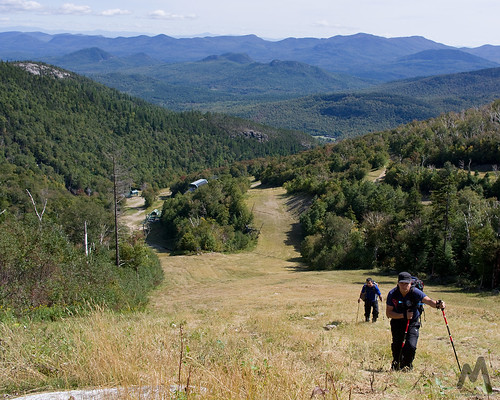
Grassy ski slopes wonderful for hiking
Ski slope ascent.


The best laid schemes of mice and men...
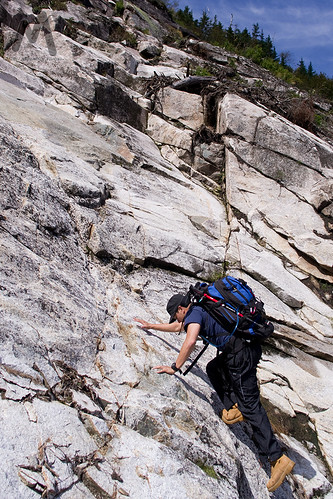
Ascending the lower slabs of Whiteface Ski Slide #3
Ascending the lower slabs.


After careful planning everyone was on board, the trip was thoroughly planned, and the route exactly as expected.

Whenever I plan a trip with people that are unfamiliar with the terrain, region or technical difficulties, I try to be as explicit as possible. Though not all the trips go as planned, very rarely do we come across a situation that wasn't thoroughly covered and re-covered. The preferred goal is to be self sufficient when I'm in the mountains. Even a well prepared trip can have a serious accident requiring rescue, but starting out behind the curve is just reckless; putting everyone, including rescuers, at risk for no reason.


Even the band must face the music...
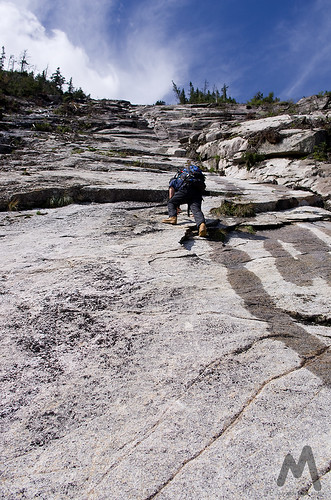
Ascending the lower slabs of Whiteface Ski Slide #3
Ascending the lower slabs.
The moral is be careful what you wish for. While still low on the slide and solidly on the 2nd class terrain the chatter became, "how much steeper does it get." Or, "is there a secondary way around it."

Since the goal of the trip was technical slides, I actually never considered any other option but technical slides, and was prepared for anything that involved the slides, including bailing and rapping to the bottom if need be. I definitely wasn't bushwhacking to the top though!

As far as the difficulty of slide #3, I'm quite certain with the right partner and top rope belays, I could have gotten my dog, Colvin, to the top of the slide. He isn't the climber Caney was, but he will climb hard when on belay. So, without question, it was definitely climbable by humans wearing sticky rubber shoes!
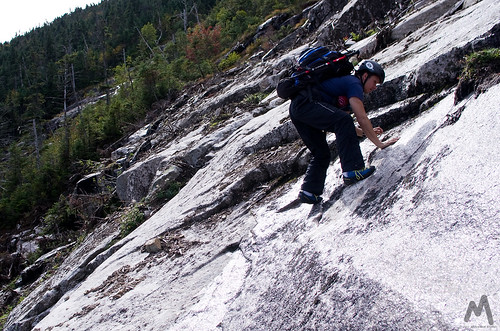


Ascending the lower slabs of Whiteface Ski Slide #3
Ascending the upper section of the lower slabs.


Committing to exposure...

The problem, of course, is exposure. It separates climbers from non climbers. Making a few 3rd, 4th or even 5th class moves with the comfort of a 10 foot drop to flat ground is not very committing, but when you are looking down at 100ft run out falls, followed by a band of tightly packed spruce trees waiting to rip you to shreds and then 100 more feet of 60* slide below that, things change really fast. Basically, when you are looking at death or serious injury, the description of 2nd, 3rd or 4th class in a book becomes entirely irrelevant for that moment. Commitment is everything in climbing, and I've personally shit my pants plenty of times before either committing to a crux move or bailing and handing it off to my partner.

I'm not, at all, making fun of my partners, the slides were wet and slimy in places (expected) and much of the 2nd and 3rd class climbing was polished rock (also expected, and the reason for rock shoes). But the steepest climbing, the class 4 terrain, was actually pleasant. Other than the pine needles interfering with grip at the edges, the rock was grippy and dry going up the center. If I didn't have to fix the lines to the trees, I think the 4th class climbing was not only the most fun section, but also the safest. Unfortunately, I had to move to the edges to fix the rope, which made exiting back to the slide a bit dangerous for me.
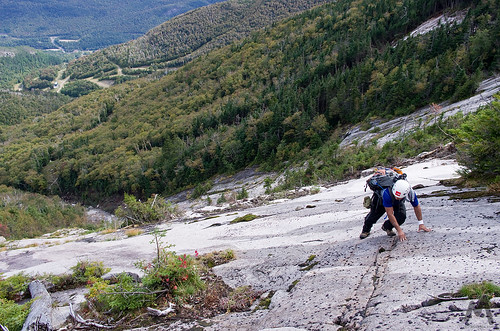

Lower slabs Whiteface Slide #3
George traversing across the exposed wet lower slab on Slide #3.


Raybrook, we have a problem...

Preparing to climb Whiteface Slide #3 crux headwall.
John and George below crux pitches of #3.
Being what I thought was over prepared, we avoided a rescue situation, in spite of rescue being, briefly, a serious topic of conversation. One partner, John, wanted off the slab ASAP and decided to bushwhack 600ft through the band of trees in between Slide #3 and Slide #4. That in itself was a hell of an endeavor. Kinda like choosing death by 1000 slices over a single bullet to the head. Me, personally, I’m taking the bullet and sticking to the rock. There was no discussion, he made a beeline for the trees and we didn't see him till the summit.


George also wanted no part of the 4th class slabs, but I was able to get him to finish the slab, rather than take a steep and dangerous 'whack through the trees on 60* slopes. George was pretty sketched after a 10ft slide down some very steep terrain as he -also planning to leave me for dead on the slide- attempted to get to the tree band between slides #3 and #4. He did everything right during the slide downward, and didn't get too scraped up as a result. I then got him to traverse over to the crux pitch via a Prusik and a fixed line.


Once at the base of the crux pitch there was a small ledge for us to change to rock shoes. In hindsight, we changed to rock shoes 50ft above where were should have, and that probably was a factor in George’s uncontrolled descent. We used the ledge to re-organize our gear, have a snack and mentally regroup. He was pretty shaken up, so we took a sizable break.

George was cramping, probably from a combination of nerves, dehydration and lack of electrolytes. He was actually cramping so bad he couldn’t tie his rock shoes himself. I don’t think he was eating much on the slide, so I gave him an electrolyte tab for the cramps as we discussed the options of ascent or descent.

Once we were rested, I was certain George could get up this with the help of the ropes and rock shoes. Traversing across to Ski Slide #1 was foolish, rapping was equally foolish, more so since I'd have to lower him or counter rappel and then we’d still have a long miserable walk down the ski slopes.
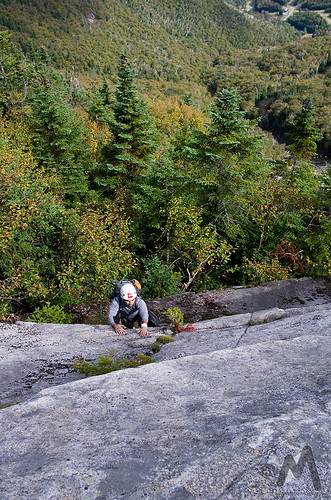
Headwall
George on a headwall.
Unfortunately, the day of cragging I'd planned for Friday didn't happen, so we were a bit behind the curve with climbing and descending techniques. This definitely didn’t help matters. Had we descended, the down climbing on the first pitches was easy enough, but down climbing always seems harder. To me, the best option remained to finish the climb.

By the time we were done with the break, John had made it either to the summit or at least off the slabs via his long bushwhack. In either case he was calling down to us, and we were calling back to him. Apparently the second group on Ski Slide #1 felt we were in trouble, and subsequently left a note on my car noting (incorrectly) that they saw us on Slide #2 and to call them before dark...or else!

I’ve always noted that climbers and mountaineers tend to be very considerate, often without question sacrificing their own trip, their gear, and their own safety to help other people in need. Though I was a little curious as to why they thought we were in trouble, I appreciated the sentiment. John did give them a call back when we were on our way to Lake Placid for dinner.

With George and I still on the slide, the crux pitch -the 4th class terrain- was about 80-120ft of 60+ реж open slab. Starting to trust the gear, techniques and rope system, George eventually calmed down. After two rope lengths of fixed lines, he was able climb above the rope on his own, all while still on the open -runout- 4th class terrain.

I never intended for him to climb above the anchor on the static rope and Prusik, which I was using purely as a fixed line for ascent from below. Nor did I think he would decide to do that. And it was this section, on this setup, that I was actually most concerned for his safety were he to fall. The problem was, once he started out, I wasn't about to explain to him the issues with static ropes and high fall factors, assuming, of course, the Prusik didn't burn through. When you have a rope and you trust it, sometimes it's enough to calm you down to be able to make the moves you need to.

At the top of this pitch, George set up a fixed line for me since I wasn’t too keen on traversing out away from the several feet of pine needle covered slab. Unfortunately, I did not have another Prusik, and the Kleimheist, which I have probably never used in actual climbing, just wasn’t coming out correctly. I later realized the mistake I was making. Regardless, once above the needles the rope became unnecessary and the slab was nice and grippy.

This was the last section which we used the rope, and eventually made it up the remainder of the head wall to the top of the climb. The climbing again got wet and dirty, but also less steep. A few minutes later we had to contend with the heinous bushwhack to the top.
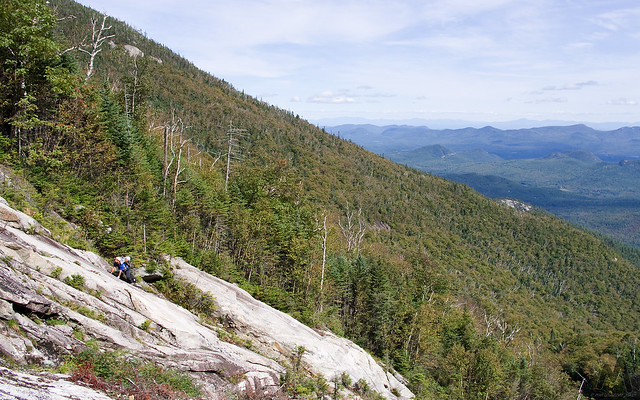
Ascending old Whiteface Slide #3
George on old Ski Slide #3. John and I climbed the new Spring 2011 widened section to the left.


It’s a love hate relationship...

Had we been able to traverse to Ski Slide #4 as originally planned and climb it's crux, we only had a short bushwhack to the summit trail. From the top of #3 we had at least 200 vertical feet of steep 'whacking. Two sections were vertical for me, including a vertical wall of moss cleverly disguised as rock, though my partner managed to find ways around them. It seems John also found this camouflaged wall of death, as he confirmed my description of it, and I saw recent footprints while ascending it. It took us about 30 minutes to climb that final 200ft, in comparison, the top of Slide #1 to the summit was a mere 10 minutes.

Though it’s the case on every bushwhack, this one seemed especially rough. The very trees we needed to pull ourselves over mud and moss covered rock slabs were also trying to rip us apart.
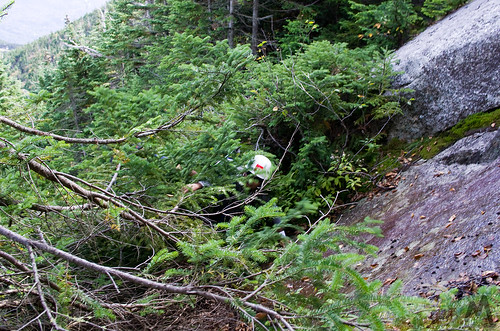
Short bushwhack between sections
Little bushwhack between slab sections. Nothing like the final bushwhack to the summit.

I went left, up the steepest of the slabs/walls. It was an easy 3rd class zig-zag that got me out of the trees and onto drier rock. George when right, and ended up on the trail a few feet to the north. Climb complete!


Final verdict...
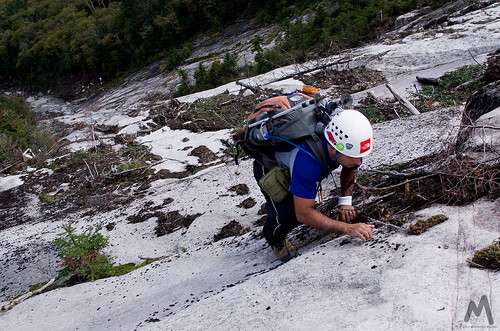
Ascending the lower slabs of Whiteface Ski Slide #3
George on the lower slabs with another group below.


I personally had a great time. Though, as usual, the trip didn’t go as planned, 2 of us did climb Ski Slide #3. We can put that in the books as a success. I just have #2 and #4 to knock out. We didn’t descend the Lake Placid/Whiteface Brook Slide as planned. Apparently slides are a lot tougher than they appear, and neither of my partners had any desire to revisit one so soon. I didn’t argue much with the group decision to skip the LP Slide descent. I was fine with the 2 mile longer hike out and a bit more of a workout. Plus, while the LP Slide would have given us 30 minutes more of light, we were still bushwhacking in the dark. I’d prefer to just stick to the trail than lose an eye on a night ‘whack.
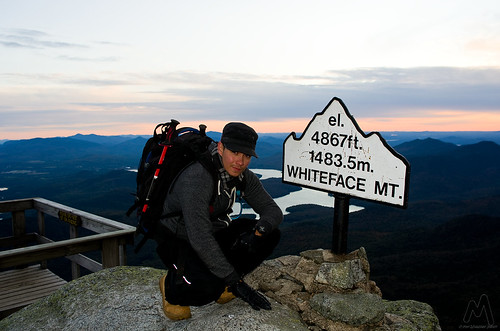
Summit Success - John Harkin
John on Whiteface

I let the guys take off ahead on the descent because, apparently, I have some issues with falling when I’m keeping ahead or keeping up on descents. After two spills, I gave them a 5 minute lead and met up at the bottom of the descent, about a half mile from the lean-to. I was surprised they were only two minutes ahead of me, and yet I hadn’t fallen once in the 2 miles they hiked in front of me. Within two minutes of catching them, I fell into waist deep ditch, which I threw myself out of and then hopped, skipped, crawled, rolled and flew 20ft down the nearly level trail till I could regain my balance. Fortunately it was the last of that.

After filtering water at the lean-to, it was a non stop trip to the car.

Once we got back to the flat or rolling terrain that is the Connery Pond/Whiteface Landing trail, John and I started alternating between jogging and speed hiking. We ended up averaging a little over 4.5mph for the last 3 miles. I estimated my pack was at 25-30lbs so I was happy with the pace. My body agreed Monday morning after repeating the loaded pack run up and down Lake Road to Ausable Lakes.

Back at the car, 10 miles, 7500ft vertical feet and 11 hours later, we were primarily concerned with dinner. Lake Placid Pub and Brewery was out, and Wise Guy’s in Lake Placid was in for a well earned burger and beer!
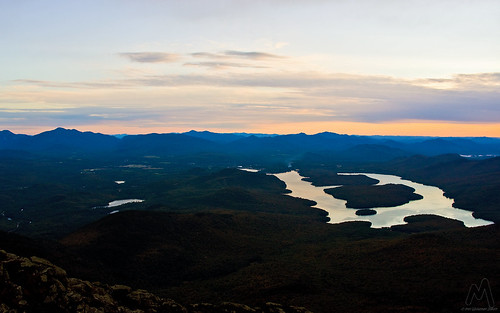
Sunset over Lake Placid
Sunset over Lake Placid from Whiteface Mountain.

Lessons learned...

1. It’s been a wet summer, and a wet few weeks. I would personally avoid the Whiteface Ski Slides in summers like this. This is the sort of endeavor best suited for a drought year like the summer of 2007.

2. Known but reinforced. You are only as strong as the weakest member of your group. Always plan around that. Never underestimate the challenge based on your least experienced members comfort level.

3. I would not recommend climbing a runout 3rd or any 4th class climb with exposure without first spending at least a day outdoor rock climbing. You can work on basic skills and techniques far better in the controlled environment of a rock crag than 600ft off the deck. Obviously, climbing on a top rope isn’t the same as soloing exposed 4th class terrain, but it is something to help put perspective on your climb.

4. Starting out over-prepared sometimes means you end up plain old prepared. Self sufficiency is a cornerstone of mountaineering and should always be the primary goal. I actually didn’t expect to be in the situation we were almost in, but I did think about it as a worst case scenario. In the end, it saved us a call to Ray Brook for DEC assistance off the mountain.

5. While rock shoes could certainly be justified for the crux pitches, I’m inclined to think a good pair of sticky rubbered approach shoes could be better provided you are experienced at climbing slabs and slides. This is because you often travel between wet moss and mud, followed by dry steep rock slabs. Switching shoes is impractical, but often a rock shoe isn’t right or a boot isn’t right for the terrain.

6. Do not underestimate slabs/slides. Unlike vertical or overhanging rock, they tend to not discriminate based on the climbers BMI (fat factor), but they require complete and total trust in your sticky rubber shoes and footwork. No pulling jugs, no false sense of security as you strong arm your way up. They are in a sense the perfect starting point for technical climbing, as they force novice climbers to realize how important the feet are in ascent. Climbing is often thought of as a world of upper body strength, but the reality is good footwork is the foundation to all

7. Exposure changes the game. A lot of trails in the High Peaks have similarly steep slabs but with only a 10 or 20ft fall potential. Looking down at 100-400ft or more of unbroken fall is a game changer in terms of mentally conquering the climb. Anyone planning a slab or slide climb should really consider their own tolerance for exposure before committing to a long climb.

8. Rock shoes, helmets and ropes. Whiteface Slides are steep enough that knocking rock loose could be a problem, however, the helmets actually helped with the bushwhack. Necessary? Debatable, but probably not overkill if your group isn't being careful to check for loose rock. Rock shoes (or sticky approach shoes) on the other hand were pretty much a requirement. The slides are seemingly polished, and the extra traction is never a bad thing. Ropes and harnesses, and the ability to use them can keep things from getting out of control.

Slideshow of additional images from the 2011 slide climbs on Whiteface Mountain. All images with Pentax K-5 DSLR and DA 21mm Limited or FA 43mm Limited lenses. 


Friday, October 14, 2011

Sunset on South Dix Mountain

Sunset over South Dix Mountain - Dix Mountain Wilderness
Aim and Colvin descending South Dix, one of the Adirondacks most interesting peaks.


I guess hanging out on remote summits waiting for the sun to set isn't for everyone, we still had a 4 mile hike back to base camp over herd paths -unmarked trails that may or may not exist or lead to your desired location. But even when I'm not setup for the sunset with my camera bolted down to a tripod, I still love the light that only comes at the start and end of the day.

We made it down safely, actually only needing our headlamps for the last mile. Aside from occasional blowdown, we didn't have any problems finding our way back till we got to a flooded area not far from the main trail. By this point we knew we were close based on the altimeter elevation, even if we couldn't find the herd path again, taking a bearing and bushwhacking to the trail wouldn't have been particularly hard.

Dix Mountain Wilderness is perhaps my favorite "high peaked" area in the Adirondacks. Fewer visitors, fewer trails (more adventure via bushwhacks and herd paths), some of the most scenic peaks in the entire Forest Preserve, dare I even say the entire Northeastern US.

However, relatively long approaches -some with only seasonal access- make this area far less traveled and photographed than other areas of the High Peaks region of the Adirondack Forest Preserve.

Dix, the highest peak in the Dix Mountain Wilderness, rivals the harder high peaks for length of approach with a minimum distance day trip being around 13 miles.  Elevation change is also fairly significant, with total gain loss near 8000 vertical feet, just for a single peak. It might not be under the umbrella of the High Peaks Wilderness, but it's definitely a High Peak!

The most interesting aspect of the Dix Mountain Wilderness and the Dix Range is the plethora of slide climbing opportunities. Ranging from Class 2 rubble piles, such as the Macomb Slide, to 5th class technical climbs, like the Hunters Pass slide, the Dix Range offers a little something for everyone.

Saturday, September 24, 2011

Taking Dix from both ends can leave you with a Whiteface!

Aim ascending Whiteface Ski Slide #1

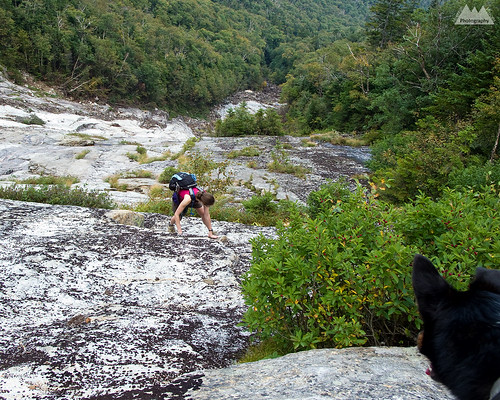
Following our removal from the Dix Wilderness by the DEC, we had to find alternate plans for the remainder of our vacation. Slide climbing had always been on the agenda for the second half of the trip, so with 3 major slide filled wilderness areas closed, my eyes turned to Whiteface.

Approaching and descending from a ski slope would seem to be easy. As you drive by them on the road you see grassy fields that look like a pleasant way to ascend and descend a mountain. Perhaps Whiteface is different than other slopes, but it was anything but a leisurely walk.

The ascent was fine. We actually took the Stag Brook Trail -lower and upper- which gained about 1500ft or so. This was in the trees, on a trail parallel to the beautiful rushing Stag Brook with it’s numerous waterfalls and cascades. I don’t know if Stag Brook is typically dry in summer, my guess is that it normally doesn’t flow quite this much. But following hurricane Irene, it was quite full and beautiful.

Stag Brook Falls

At the top of Stag Brook trail, we began the ascent via the ski slopes. Immediately the 80+F (26C) heat with high humidity became an issue. Mid summer heat and humidity in September, on a shadeless open slope = fun times.

Understanding why you ski down them!

The slopes are actually quite pretty, many wildflowers and butterflies to be seen during the ascent. We could also see our objective quite clearly. Both the summit of Whiteface and the slide bowl -or as my wife refers to it, the hell hole.

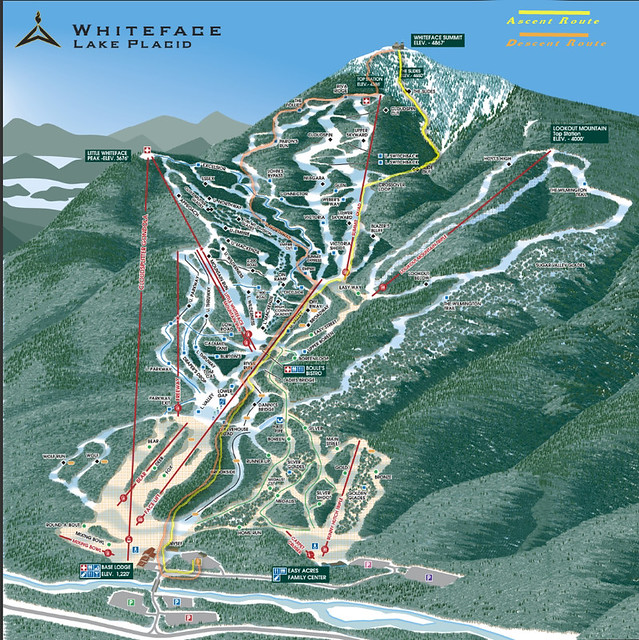
It was about 4pm when we finally got to the base of the slide. Slides 1 and 3 are immediately visible in the bowl. Just bear left and start up #1, #3 is slightly to the right (center). #2 two splits near the upper half of #1, and #4 appears to require some bushwhacking to gain the base, but nothing heinous. My next trip here I will be doing Ski Slide #3 and then traversing over to Ski Slide #4 to summit via the crux pitches of #4. For this trip though we just did the easiest of the four, #1.

The slide was relatively dry as a whole, but there were many wet sections and many streams of water flowing down. Mixed in were a few slimy sections. For this reason we zig-zagged around a lot of the slide seeking the driest terrain versus the easiest terrain. Typically, I look for the harder climbing on class 2, 3 and 4 terrain to make things interesting, but this time we ended up on steeper and drier sections because of necessity. Oddly, I usually feel like the climbing is easy, but on this slide I felt like it was steeper and more dangerous than the trip reports suggested. I might be getting soft, or I might just have been concerned about Colvin.

A concerned Colvin watches the ascent

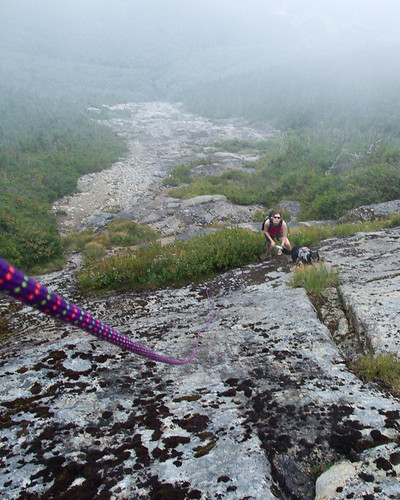
Colvin climbed the class 3 slide with relative ease, but because of his extreme concern and loyalty for us, he put himself in dangerous positions several times by returning down from difficult sections to “assist” or encourage us. There were 3 sections where I roped Colvin. He was wearing his Ruff Wear Doubleback technical climbing harness, and I used a hip belay and 8mm static cord to give him a little assistance over some fairly steep sections that were above significant runout. In these sections, I felt a fall could become dangerous beyond the initial impact. It’s quite funny, really, but he is very comfortable climbing while roped. Whereas my last dog, Caney, who was a much better climber, almost human good on technical terrain, did not like being roped up.

Final ascent before bushwhack
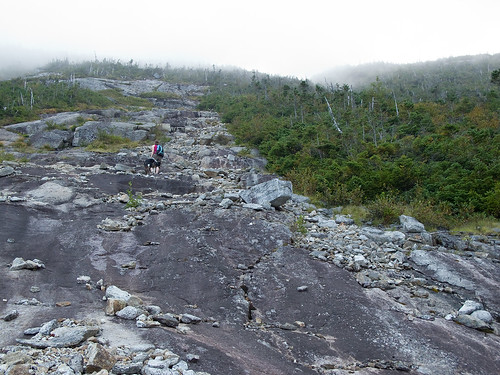
The mental crux of any of these longer semi-technical climbs is the exposure. There are sections of trail throughout the Adirondacks with slabs this steep, or even steeper, but few involve looking back down at hundreds, or even 2000ft, of unbroken fall beneath you. There were few sections on this slide where there was potential for fall for even a novice climber with a grasp of fundamentals, but if a fall were to happen, it could be fatal. I would say that if you were to fall on the first 200-300 vertical feet of the slide, you could potentially fall all the way to the bottom without stopping depending on your path during the fall, though more than likely you would stop. The higher up you got on the slide, the less steep it became. In many spots any sort of significant fall was near impossible, and it was just like hiking any steep, slabby trail.

Climbing the slabs - Whiteface Ski Slide #1
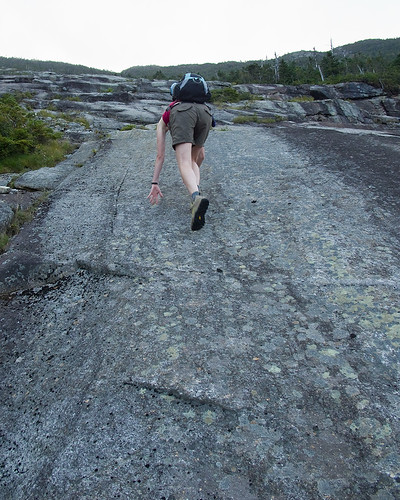
Falling on a slab climb or slide is actually quite serious. More serious in my opinion than a beyond vertical rock climb with good protection. When you fall it’s not a matter of if you will hit something, but how far you will slide before you stop. Skin and rock don’t mix well. Even a minor fall can lead to weeks of healing. That said, I’m a confident, and I hope, a good friction climber, slabs have never bothered me, and I enjoy climbing them. Generally speaking, people either love or hate slab climbing. There is no middle ground.

The left side of slide #1, though not extreme left, is more ledgy with verticalish steps of 3-10ft. Staying towards the center is more a mix of ledges and slab, while far right is mostly smooth slab. In dry conditions, the right side seems like it’s the best route for friction climbing. In wetter conditions, the center left gives a nice mix of rest ledges with secure stances, dry friction, and good positive holds.

The extreme left, which would be on the treeline, is very wet, muddy and also slimy. I would not consider this an option unless it was already raining and you were using the trees for assistance. Even then, you might be better off towards the center or right sides.

While the easiest of these slides are really glorified hikes, and the hardest are technical rock climbs, I’d recommend people have some climbing experience before undertaking them. Also, I see a lot of hikers bring ropes with them while hiking, but few actually know how to use them. Figuring out a rope 750ft off the deck of a slide really isn’t the ideal place. Though I brought a rope, I did not bring human harnesses. I could have made a diaper harness from the webbing I had, but I think it’s a good idea to have harnesses for novice climbers and 100ft of rope, along with some webbing. Coincidentally, I did notice an old sling with a rappel ring on tree that had long since washed away. Apparently someone either descended the slide or got sketched and bailed on it.

Clouding In

When Aim, Colvin and I reached the top of the slide we were on the right side of the slide. We were greeted by a wet 15ft slab of about 45*, which was above a 5ft shelf. We scanned for a herd path before committing to the upper section but did not see one. I climbed the crack to avoid the slab itself, then I belayed Colvin up the slab. The left-center looked easier, like it went further into the trees, but it was also wet and I preferred the safety of the crack system in the slab above us.

The best part of slide climbing, the bushwhack!

Once at the scrub line, we did a quick check for a herd path of any sort. One could not be found. Knowing Aimee’s desire to be done with the slide and get to the summit, I let her forge a path through the cripple brush. About 10 long minutes later, we climbed the last 150 vertical feet to the power cable path, and ascended to the summit station. Having escaped any sort of injurious behavior on the ascent to this point, I promptly fell into a crevice while entering the tourist section of the mountain.

Thanks for the reminder!

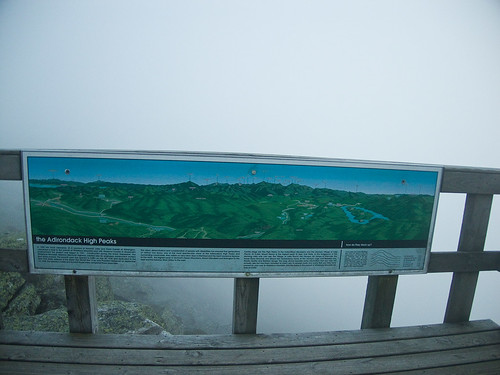
The summit of Whiteface had been in the clouds for some time while we were on the slide. When we reached the summit things hadn’t improved. Views were 20 feet tops and the sun was just about to set. A few quick summit photos and then we pulled out the map. I took a compass bearing for the ORDA trail we planned to use for descent. In hindsight, this wasn’t necessary, the summit station viewing area is marked with direction markers for tourist to use when viewing the distant mountains. However, the only other time I’d been to the summit of Whiteface was skiing to the top in the winter and I had no idea where the trails were, as the ski route simply goes up the summer tourist road. Better to be prepared while in shelter than dealing with a map in 30 mph winds and fog. We headed south for the ORDA trail, pretty quickly we spotted yellow blazes, and were on the ORDA descent trail.

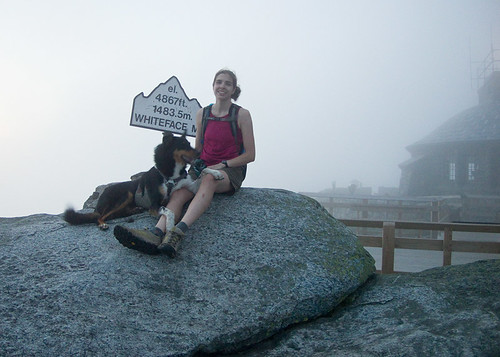
Aim and Colvin on the cloud covered summit

All I can say about the ORDA descent trail is HOLY $h!%!!! Wow! I was expecting some sort of paved tourist descent to the ski lifts, but this trail was in fact steep and interesting. It even had ropes set up to lower yourself down at least 3 sections. Though only one was really necessary.

Whiteface Slide #1

Unfortunately, this was the end of the interesting part of the day. Descending down the ski slopes in complete darkness, strong winds and occasional fog was interesting only in that we were not able to just plunge down the steepest slopes for a rapid descent. Having my mini headlamp, clearly anticipating a shorter day, I couldn’t see more than 30ft, so we took the longer moderate ski trails towards Little Whiteface, and then began a direct descent from Little Whiteface. (Coming back a few weeks later, I could see just how steep Niagara was, and was glad we didn't plunge down it's slabby decent).

Along the way, we crossed paths (literally) with a porcupine. While that was exciting in a horrific train wreck sort of way -we hate porcupines- the highlight of the knee busting, ankle twisting, back aching, filling loosening, brain jarring descent was seeing what I believe was a Fisher pop up in the grass about 50ft from us. His tightly spaced eyes and head movements led me to believe he was a predator, most likely a cat or weasel. He was directly downwind from the porcupine, and my guess he was hot on that bully of an animals tail...or rather head. 25 head bites later, that porcupine was going to be Fisher dinner.

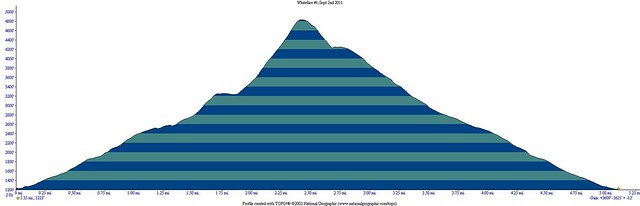
The descent went on forever, and finally at almost 9 hours into the day we arrived back at the car. I’m not sure of the total mileage, but I’d guess it was only about 6 miles. The total ascent/descent was 7500ft, which equates to well over 1000ft per mile. What really took so long was the ankle breaker scree on the ski slope descent. It was like walking on baseballs placed neatly on top of golf balls. That night and the next day, we felt like we’d done three times that distance. Even Colvin slept most of the next day. I’ve done 20 mile, 12,000ft gain and loss hikes this year and barely been sore the next day, so I was truly surprised how punishing the ski slopes were!

Whiteface Slide #1

All in all, it was a good day and a great adventure. Add this to your options for life outside the High Peaks Wilderness, but do yourself a favor, trust me on the ski slope brutality and figure out another way down the mountain! Even if you have to carry a sledge hammer to the summit to break your own femur with and call for rescue, it will be better than descending the ski slopes!