Showing posts with label climbing. Show all posts

Tuesday, April 22, 2014

There's more than one way to re-sling a cam!


That moment when you realize no one will be accidentally walking off with your custom climbing gear.

The thought process behind this setup:

Since I've gotten kind of promiscuous (in a non standard use of the term) with my selection of climbing partners. I am relying on my rack as the primary vs the box of chocolates that might show up. Therefore, I didn't want to be without my cams for 2 weeks while I send them off to Yates Gear for re-sling.

I considered the more popular, Blue Water Titan Cord, which is 5.5mm and rated to 3100lbs single strand. It's used to sling hexes and light weight cordelette, but it's slippery stuff, requiring a triple fisherman's with some tails to form a safe loop. 

The other option is Sterling Power Cord, which is also rated to 4800lbs, but with a standard nylon sheath it knots like standard perlon cord. The advantage of the nylon is once the double fisherman's sees a few anchor setups, it should be pretty permanently fixed and not require paranoia of constant knot rechecks. The downside, in double fisherman's configuration, the cord fails via sheath-core slippage. You can tie a triple fisherman's but it won't increase the failure strength by much, just change the mode of failure.

Looking at the single stem Black Diamond Camalot cams I own, it seemed like 6mm doubled over would fit in the stem, making Power Cord front runner.

Next I measured out the length I needed by doing a test run with some 5mm perlon I had lying around. It was more than 24 inches to make similar length loops as the original slings, so to make life simple for the guys at Rock and Snow (rockandsnow.com), I went with 36in. I didn't mind longer loops and this would give me more leeway to tie the double fisherman's, or even a triple fisherman's knot.

Strength wise, I'm not 100% sure on what I'll be getting. Single loop 6mm perlon on Rigid Stem Friends used in the common Gunks tie off is rated to about 8kn (per Wild Country). However, 6mm perlon is significantly less strong than Power Cord and my cord isn't single loop but double loop. Looking at various test of breaking points for the single loop double fisherman's, it seems like 50% is a fair conservative average. Using two loops should decrease force on the knot. As a very conservative guess, unless I'm completely disregarding a key variable, I expect this setup to exceed 12kN. It's very rare (though not impossible) for a top piece to see in excess of 10kN in real world use, but in excess of 12kN is pretty unlikely, and my cord failing might be the least of my concerns by 13kN.

Finally, as a finishing touch, I repurposed the old sling to maintain the color coding and also ensure I clip both strands. Finding my purple, green or yellow Camalot is as easy as the day I brought them home. 

Total cost to resling 4 cams was $15 (vs about $30), and I didn't need to part ways with them for two weeks. 

Please note, this will only work on this style Black Diamond Camalot. Do not try this on wired U stem cams. The reason is the cable can cut the cord or webbing. For those cams, such as my TCUs and Aliens, I will be having them re-slung professionally. 

Also, I do have some concerns with the long term use of Power Cord fatiguing over the edges of the stem hole, this wouldn't be an issue with Perlon. Eventually I'll mail them off, but probably not until the winter. For now I have a really unique and safe setup, that should get me through this rock season.

If you are a physics or materials science expert, feel free to send me a comment as to anything I might have missed about the safety of this setup.

Tuesday, February 21, 2012

A postmortem to Winter 2012


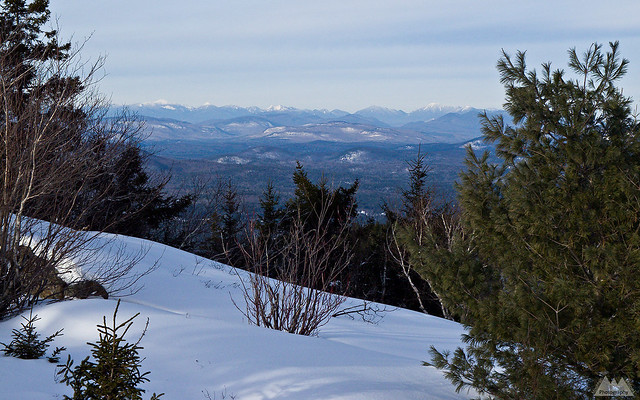
High Peaks from West Crane Mountain
January views of the High Peaks from the summit of West Crane Mountain. The photo is deceiving, as there was only about 7-12in of snow on the ground, much of which melted in the following days of warm rain.
 
March and April are historically the biggest snow months at elevation in the Northeast, and over the last few years winter hasn’t really stuck around until Presidents Day weekend, chiefly because of arctic highs forcing moisture snow) south into the coast and southern mountains. However, unlike this year, we’ve had a few false starts in those years. Plenty of snow, then a warm rainy spell with it's accompanying meltout. Enough that snowshoes and skis would have seen some justified use by Presidents Day, even if skiers and climbers weren't completely happy with conditions. 

This year, despite snow in the High Peaks and lower elevations right on schedule, it’s been pretty much shoulder season conditions since the start. It hasn’t been typical Northeast extremes keeping us in a state of perpetual November, just consistently mild weather. No record highs, but lots of 40 degree days with rain.

Looking at the climbing logs, it looks like it’s been a decent ice season for people putting up free climbs I couldn’t aid with a bolt gun. Some very ballsy and serious routes have gone up all over the Northeast. But Scottish mixed climbing has existed in conditions like this for decades across the pond, even if it is just now making a renaissance in the Northeast USA.

Skiers, on the other hand, haven’t had much to choose from. Unlike ice climbers, skiers -as a general rule- don’t get masochistic pleasure from finding the worst possible snow conditions and skiing.

While I’ve gotten a few trips out on ice, to date I haven’t actually needed my snowshoes. Granted, I haven’t needed them largely because lower elevation conditions are so poor I just haven’t wasted the fuel to get to the North Country’s 1000m+ elevations where snow can be found.  Uncharacteristically, I’ve yet to take a trip to Vermont or New Hampshire either. Often they have better conditions at various times of the winter. In the Adirondacks, above 2000ft there begins to be some sign snowshoes could be necessary, and I hear wonderful reports of snow upwards of 20-30 inches at 4000ft.

I haven’t really needed my winter gear at all. It’s been mild enough most days that I’ve worn my base layers and soft shell pants. Other than wearing my insulated boots because they are required for ice climbing/steep crampon terrain, I haven’t needed those either.

The lack of snow also has meant my camping gear has pretty much been mothballed. I love snow camping and winter backpacking. Pound out a perfectly flat tent pad where ever you choose, and sleep like a king in the quietness of a forest sound proofed by fresh snow. Camping on the solid sheets of ice that has replaced snow cover or the forest floor is a lot less fun.

Crampons, or rather the necessity of crampons, are a completely different story. These are standard gear from car to summit and back during 2012. Even in the Southern Adirondacks, where there was almost no snow at all on Super Bowl Sunday, we needed crampons the entire two miles back to the car, hiking on a moderately graded low elevation trail.

The most depressing fact is that looking at the NOAA CPC long range data, I can’t say I am particularly optimistic winter is going to start anytime soon. NOAA says that we will continue with above average temps into April, along with normal precipitation. Neither of these factors scream big snow systems or extended cold.

No doubt we’ll get a blizzard in April to muck up spring hiking and rock climbing season. Other than that, I don’t see our recently historic trend of 8 grand weeks of winter beginning in late February.

I suppose the silver lining is I didn’t fork out $220 on those Tubbs Flex Alps I’ve been eyeing since last winter. Maybe I’ll score a used pair over the summer for a bargain price. I’ve also driven 75% less than a typical winter, which is good for the wallet, good for the odometer, and good for the environment.

All that said, I like living in this part of the country because of our four “over rated” seasons -as Left Coasters and Gulf Coasters like to put it. So no matter what the benefits, it still sucks to completely miss out on the most unique of those seasons.

Winter 2012, you had so much potential, but you never really stood a chance in this cruel world!

Tuesday, October 18, 2011

Whiteface Ski Slides, Bananas Gone Ape Poo

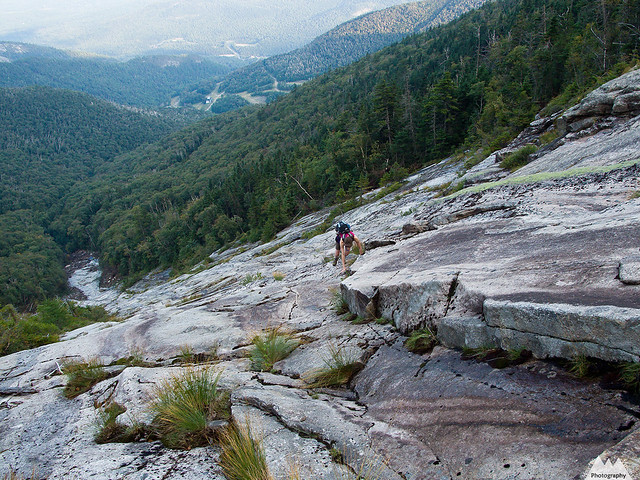
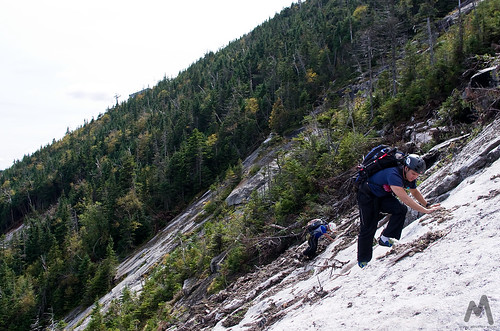
Ascending the lower slabs of Whiteface Ski Slide #3
Traversing across the upper section of the lower slabs of Whiteface Ski Slide #3.


I once staked my own path to a Christian heaven arguing the absurdity that animals couldn't go to heaven. Because my confirmation teacher was unable to provide any meaningful proof he was more in the know than my own principles, it actually led to me dropping out of confirmation before my 3rd and final year. Anyone can make up a story, and in mine, dogs do go to heaven, and if not, they just become worm food like you and I!

So if I was correct so many years ago, Caney was looking down on us Saturday with a big smile on his face, saying, "how do you like those slabs now." Karma is a cruel bitch, especially when you blindly question the commitment and effort of those who have done what you have not.

A few months ago, George questioned how tough climbing a 5th class slab really could be. "What does it mean to climb a slab", "If a dog could do it, it can't really be climbing," -can it? "Dogs can't actually rock climb." As if rock climbing only involved the vertical pieces of plastic and gri-gri's found in your local gym! Of course it burned me up, mainly because till that point (and till this day) George had never climbed a harder route than Caney. It also burned me because that dog logged more vertical with me than any two humans combined and never put me at risk once, never quit on me, and always impressed me. Even days before he died of cancer that had spread to his spine, he left me thinking how could a cute little 50lb fur ball possibly be that insanely tough. Add in the fact George didn't really understand what exposure was and how it changed everything about a climb, and I was starting to steam on the summit of Slide Mountain on that May Day.

Caney had freakish technique coupled with the arrogance (confidence) of an elite climber, but he also had no fear of heights, exposure didn't scare him. It made no difference to him if we were 10 feet off the deck or 1000ft. It was climbing and nothing more. So, it was ironic that on Friday morning as I started to pull away for the Adirondacks, I went back into the house and grabbed my dog tag that memorializes the best trail canine ever, and Saturday was for him!
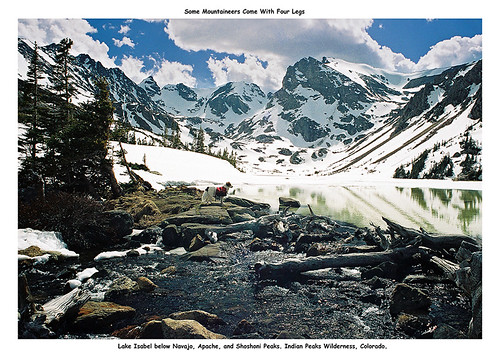
Caney At Lake Isabel
Caney before we entered the IPW and spent several days climbing and descending the glaciated peaks in the background.


What plans...

We spent about 3 months planning for the Trap Dike with a MacIntyre Range traverse. A really solid day that bagged five 4000ft peaks, and had Great Range like elevation changes, mixed with semi technical climbing. If you are going to put it all out for a single day of hiking, that would be the trip I'd do!

Then Irene came, the High Peaks closed, roads closed, the Trap Dike and Colden were among the many slides that grew or were entirely new in the Adirondacks.

Much meticulous planning down the drain. Still, my partners wanted to do something "technical" or as they put it, "the more technical the better." With Giant and Dix Wilderness closed as well, my eyes turned to Whiteface.
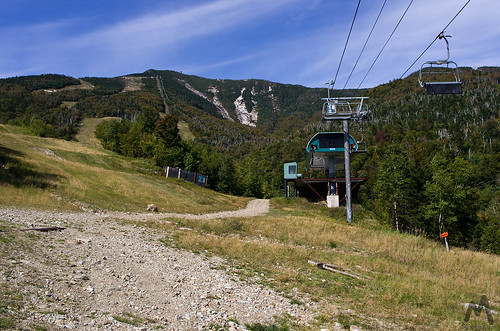
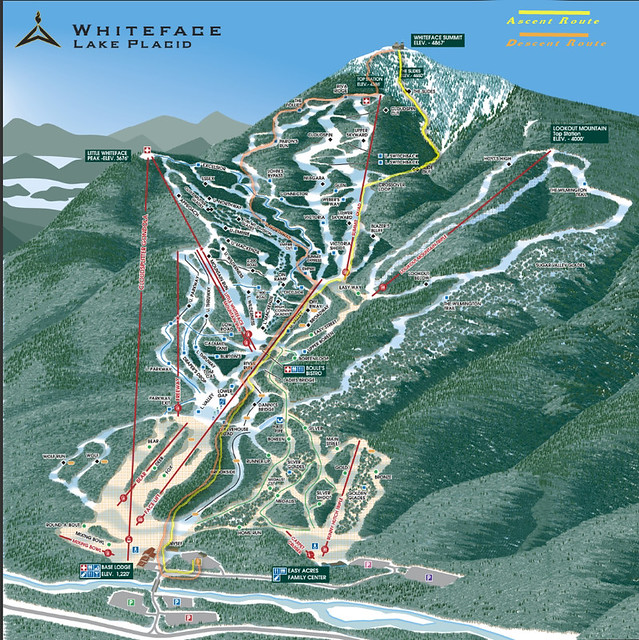
Slide bowl and summit
Slides and summit from the ski slopes.

Though, I personally thought the Dix Range and Macomb Slide was perfect for slide climbing virgins, Whiteface was open for business immediately. To me, it made more sense to plan for the most likely definitive option. Besides, with the exception of Ski Slide #1, most of the slides are rarely climbed. We’d be doing something that not a lot of people do very often, a real adventure. So while I was certain that the Dix and Giant Ranges would open shortly, I decided the bigger adventure would be Whiteface!


Men don’t do 2nd class slides...
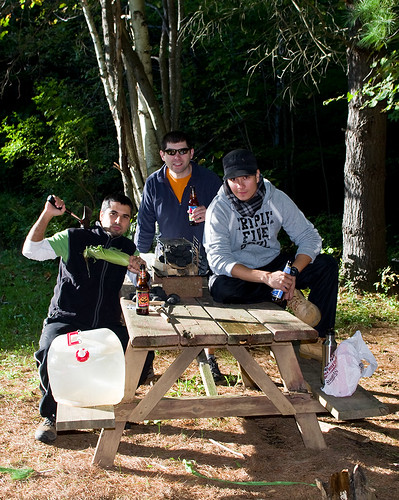

Celebrating success!
Proudly displaying our redesigned grill.
Ironically, while gearing up at the Whiteface Ski Center parking lot, a group of 3 or 4 guys asked us what the easiest slide was. I commented the far left side, Slide #1, is the one you want, but mumbled under my breath (jokingly) that real men don’t do 2nd class slides. John and George laughed with me!


Aim, Colvin and I checked out Whiteface Ski Slide #1 on a recon mission a few weeks ago. Ski Slide #1 was definitely not "technical." It was mostly Class 2 climbing, with cruxes in the 3 range depending on your route selection. Even accounting for the fact we were climbing it just days after Irene dumped up to 8 inches of rain, the wetness just made it a little more scary, but not significantly more difficult. For the purposes of our more technical trip, it didn't fit the description of what my group was looking for. Slide #1 is perfect for dogs, and girls with a fear of exposure, but not a real adventure in the mountains for 3 grown men.
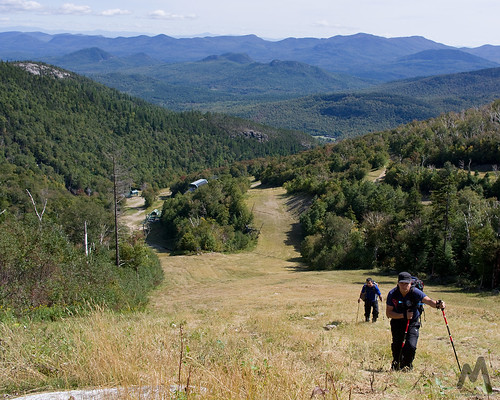
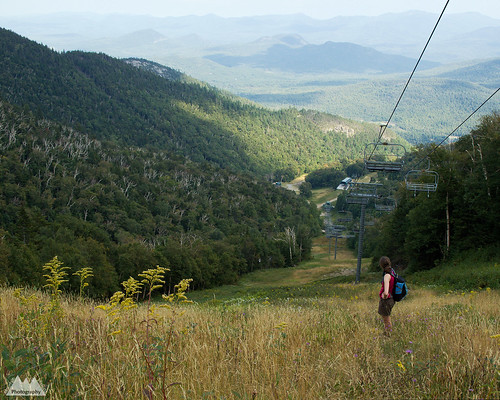
Grassy ski slopes wonderful for hiking
Ski slope ascent.


The best laid schemes of mice and men...
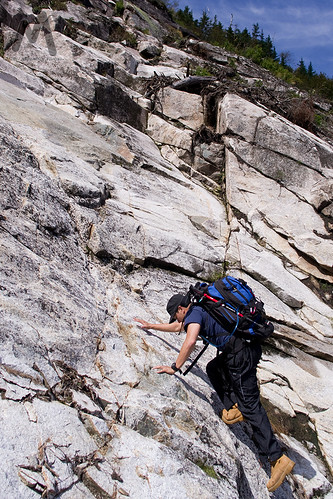
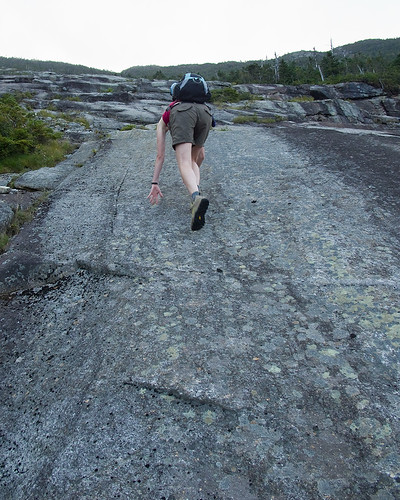
Ascending the lower slabs of Whiteface Ski Slide #3
Ascending the lower slabs.


After careful planning everyone was on board, the trip was thoroughly planned, and the route exactly as expected.

Whenever I plan a trip with people that are unfamiliar with the terrain, region or technical difficulties, I try to be as explicit as possible. Though not all the trips go as planned, very rarely do we come across a situation that wasn't thoroughly covered and re-covered. The preferred goal is to be self sufficient when I'm in the mountains. Even a well prepared trip can have a serious accident requiring rescue, but starting out behind the curve is just reckless; putting everyone, including rescuers, at risk for no reason.


Even the band must face the music...
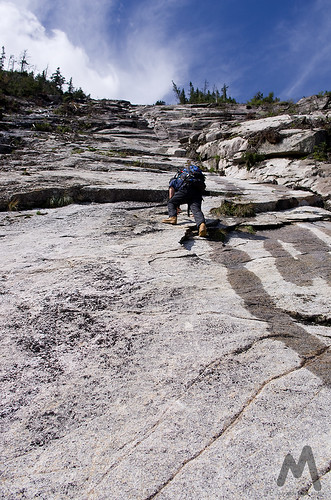
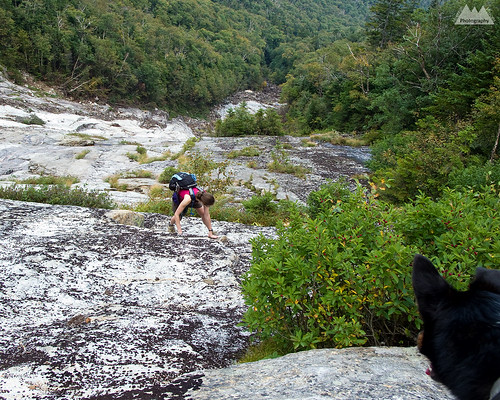
Ascending the lower slabs of Whiteface Ski Slide #3
Ascending the lower slabs.
The moral is be careful what you wish for. While still low on the slide and solidly on the 2nd class terrain the chatter became, "how much steeper does it get." Or, "is there a secondary way around it."

Since the goal of the trip was technical slides, I actually never considered any other option but technical slides, and was prepared for anything that involved the slides, including bailing and rapping to the bottom if need be. I definitely wasn't bushwhacking to the top though!

As far as the difficulty of slide #3, I'm quite certain with the right partner and top rope belays, I could have gotten my dog, Colvin, to the top of the slide. He isn't the climber Caney was, but he will climb hard when on belay. So, without question, it was definitely climbable by humans wearing sticky rubber shoes!
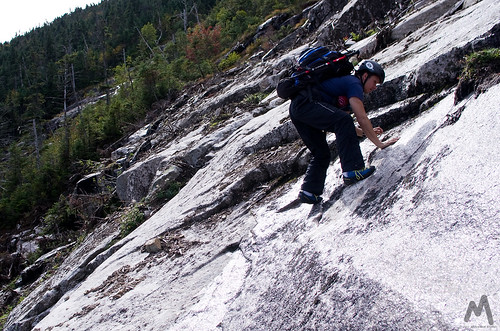


Ascending the lower slabs of Whiteface Ski Slide #3
Ascending the upper section of the lower slabs.


Committing to exposure...

The problem, of course, is exposure. It separates climbers from non climbers. Making a few 3rd, 4th or even 5th class moves with the comfort of a 10 foot drop to flat ground is not very committing, but when you are looking down at 100ft run out falls, followed by a band of tightly packed spruce trees waiting to rip you to shreds and then 100 more feet of 60* slide below that, things change really fast. Basically, when you are looking at death or serious injury, the description of 2nd, 3rd or 4th class in a book becomes entirely irrelevant for that moment. Commitment is everything in climbing, and I've personally shit my pants plenty of times before either committing to a crux move or bailing and handing it off to my partner.

I'm not, at all, making fun of my partners, the slides were wet and slimy in places (expected) and much of the 2nd and 3rd class climbing was polished rock (also expected, and the reason for rock shoes). But the steepest climbing, the class 4 terrain, was actually pleasant. Other than the pine needles interfering with grip at the edges, the rock was grippy and dry going up the center. If I didn't have to fix the lines to the trees, I think the 4th class climbing was not only the most fun section, but also the safest. Unfortunately, I had to move to the edges to fix the rope, which made exiting back to the slide a bit dangerous for me.
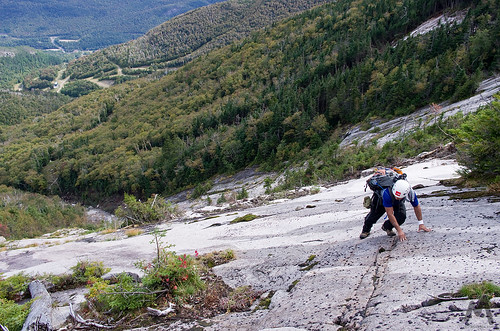

Lower slabs Whiteface Slide #3
George traversing across the exposed wet lower slab on Slide #3.


Raybrook, we have a problem...

Preparing to climb Whiteface Slide #3 crux headwall.
John and George below crux pitches of #3.
Being what I thought was over prepared, we avoided a rescue situation, in spite of rescue being, briefly, a serious topic of conversation. One partner, John, wanted off the slab ASAP and decided to bushwhack 600ft through the band of trees in between Slide #3 and Slide #4. That in itself was a hell of an endeavor. Kinda like choosing death by 1000 slices over a single bullet to the head. Me, personally, I’m taking the bullet and sticking to the rock. There was no discussion, he made a beeline for the trees and we didn't see him till the summit.


George also wanted no part of the 4th class slabs, but I was able to get him to finish the slab, rather than take a steep and dangerous 'whack through the trees on 60* slopes. George was pretty sketched after a 10ft slide down some very steep terrain as he -also planning to leave me for dead on the slide- attempted to get to the tree band between slides #3 and #4. He did everything right during the slide downward, and didn't get too scraped up as a result. I then got him to traverse over to the crux pitch via a Prusik and a fixed line.


Once at the base of the crux pitch there was a small ledge for us to change to rock shoes. In hindsight, we changed to rock shoes 50ft above where were should have, and that probably was a factor in George’s uncontrolled descent. We used the ledge to re-organize our gear, have a snack and mentally regroup. He was pretty shaken up, so we took a sizable break.

George was cramping, probably from a combination of nerves, dehydration and lack of electrolytes. He was actually cramping so bad he couldn’t tie his rock shoes himself. I don’t think he was eating much on the slide, so I gave him an electrolyte tab for the cramps as we discussed the options of ascent or descent.

Once we were rested, I was certain George could get up this with the help of the ropes and rock shoes. Traversing across to Ski Slide #1 was foolish, rapping was equally foolish, more so since I'd have to lower him or counter rappel and then we’d still have a long miserable walk down the ski slopes.
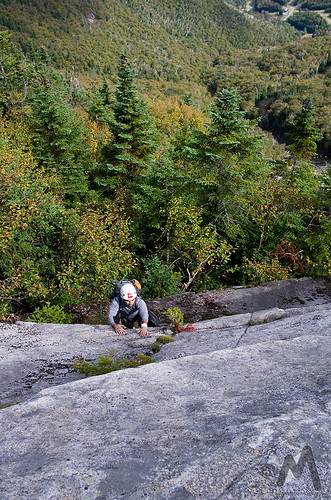
Headwall
George on a headwall.
Unfortunately, the day of cragging I'd planned for Friday didn't happen, so we were a bit behind the curve with climbing and descending techniques. This definitely didn’t help matters. Had we descended, the down climbing on the first pitches was easy enough, but down climbing always seems harder. To me, the best option remained to finish the climb.

By the time we were done with the break, John had made it either to the summit or at least off the slabs via his long bushwhack. In either case he was calling down to us, and we were calling back to him. Apparently the second group on Ski Slide #1 felt we were in trouble, and subsequently left a note on my car noting (incorrectly) that they saw us on Slide #2 and to call them before dark...or else!

I’ve always noted that climbers and mountaineers tend to be very considerate, often without question sacrificing their own trip, their gear, and their own safety to help other people in need. Though I was a little curious as to why they thought we were in trouble, I appreciated the sentiment. John did give them a call back when we were on our way to Lake Placid for dinner.

With George and I still on the slide, the crux pitch -the 4th class terrain- was about 80-120ft of 60+ ० open slab. Starting to trust the gear, techniques and rope system, George eventually calmed down. After two rope lengths of fixed lines, he was able climb above the rope on his own, all while still on the open -runout- 4th class terrain.

I never intended for him to climb above the anchor on the static rope and Prusik, which I was using purely as a fixed line for ascent from below. Nor did I think he would decide to do that. And it was this section, on this setup, that I was actually most concerned for his safety were he to fall. The problem was, once he started out, I wasn't about to explain to him the issues with static ropes and high fall factors, assuming, of course, the Prusik didn't burn through. When you have a rope and you trust it, sometimes it's enough to calm you down to be able to make the moves you need to.

At the top of this pitch, George set up a fixed line for me since I wasn’t too keen on traversing out away from the several feet of pine needle covered slab. Unfortunately, I did not have another Prusik, and the Kleimheist, which I have probably never used in actual climbing, just wasn’t coming out correctly. I later realized the mistake I was making. Regardless, once above the needles the rope became unnecessary and the slab was nice and grippy.

This was the last section which we used the rope, and eventually made it up the remainder of the head wall to the top of the climb. The climbing again got wet and dirty, but also less steep. A few minutes later we had to contend with the heinous bushwhack to the top.
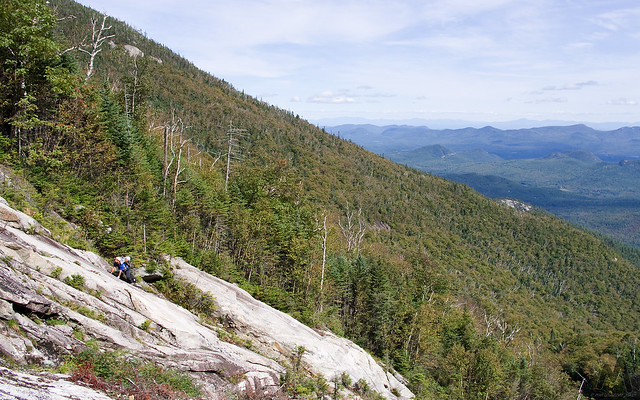
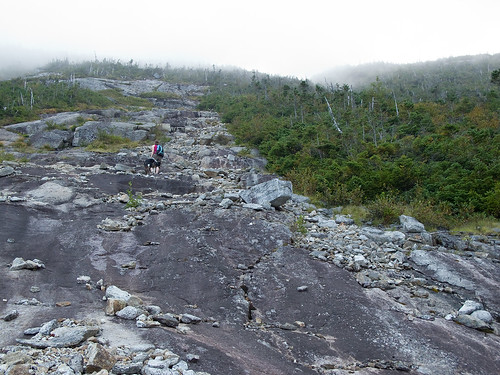
Ascending old Whiteface Slide #3
George on old Ski Slide #3. John and I climbed the new Spring 2011 widened section to the left.


It’s a love hate relationship...

Had we been able to traverse to Ski Slide #4 as originally planned and climb it's crux, we only had a short bushwhack to the summit trail. From the top of #3 we had at least 200 vertical feet of steep 'whacking. Two sections were vertical for me, including a vertical wall of moss cleverly disguised as rock, though my partner managed to find ways around them. It seems John also found this camouflaged wall of death, as he confirmed my description of it, and I saw recent footprints while ascending it. It took us about 30 minutes to climb that final 200ft, in comparison, the top of Slide #1 to the summit was a mere 10 minutes.

Though it’s the case on every bushwhack, this one seemed especially rough. The very trees we needed to pull ourselves over mud and moss covered rock slabs were also trying to rip us apart.
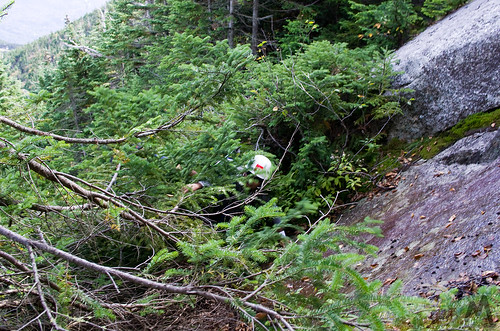
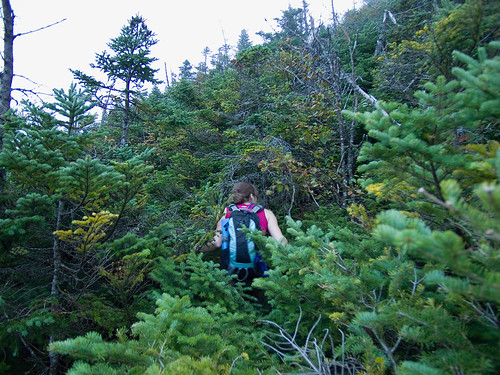
Short bushwhack between sections
Little bushwhack between slab sections. Nothing like the final bushwhack to the summit.

I went left, up the steepest of the slabs/walls. It was an easy 3rd class zig-zag that got me out of the trees and onto drier rock. George when right, and ended up on the trail a few feet to the north. Climb complete!


Final verdict...
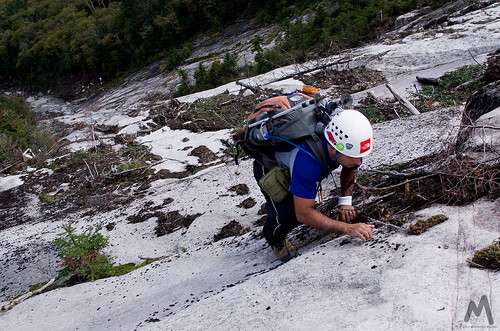
Ascending the lower slabs of Whiteface Ski Slide #3
George on the lower slabs with another group below.


I personally had a great time. Though, as usual, the trip didn’t go as planned, 2 of us did climb Ski Slide #3. We can put that in the books as a success. I just have #2 and #4 to knock out. We didn’t descend the Lake Placid/Whiteface Brook Slide as planned. Apparently slides are a lot tougher than they appear, and neither of my partners had any desire to revisit one so soon. I didn’t argue much with the group decision to skip the LP Slide descent. I was fine with the 2 mile longer hike out and a bit more of a workout. Plus, while the LP Slide would have given us 30 minutes more of light, we were still bushwhacking in the dark. I’d prefer to just stick to the trail than lose an eye on a night ‘whack.
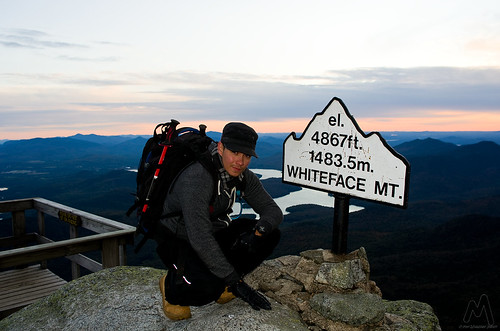
Summit Success - John Harkin
John on Whiteface

I let the guys take off ahead on the descent because, apparently, I have some issues with falling when I’m keeping ahead or keeping up on descents. After two spills, I gave them a 5 minute lead and met up at the bottom of the descent, about a half mile from the lean-to. I was surprised they were only two minutes ahead of me, and yet I hadn’t fallen once in the 2 miles they hiked in front of me. Within two minutes of catching them, I fell into waist deep ditch, which I threw myself out of and then hopped, skipped, crawled, rolled and flew 20ft down the nearly level trail till I could regain my balance. Fortunately it was the last of that.

After filtering water at the lean-to, it was a non stop trip to the car.

Once we got back to the flat or rolling terrain that is the Connery Pond/Whiteface Landing trail, John and I started alternating between jogging and speed hiking. We ended up averaging a little over 4.5mph for the last 3 miles. I estimated my pack was at 25-30lbs so I was happy with the pace. My body agreed Monday morning after repeating the loaded pack run up and down Lake Road to Ausable Lakes.

Back at the car, 10 miles, 7500ft vertical feet and 11 hours later, we were primarily concerned with dinner. Lake Placid Pub and Brewery was out, and Wise Guy’s in Lake Placid was in for a well earned burger and beer!
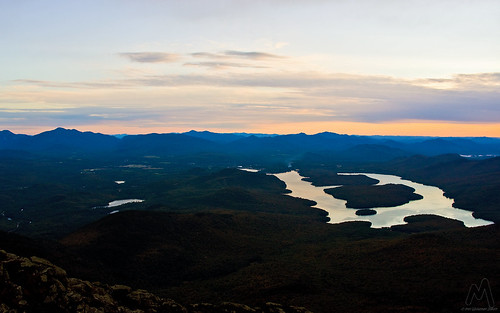
Sunset over Lake Placid
Sunset over Lake Placid from Whiteface Mountain.

Lessons learned...

1. It’s been a wet summer, and a wet few weeks. I would personally avoid the Whiteface Ski Slides in summers like this. This is the sort of endeavor best suited for a drought year like the summer of 2007.

2. Known but reinforced. You are only as strong as the weakest member of your group. Always plan around that. Never underestimate the challenge based on your least experienced members comfort level.

3. I would not recommend climbing a runout 3rd or any 4th class climb with exposure without first spending at least a day outdoor rock climbing. You can work on basic skills and techniques far better in the controlled environment of a rock crag than 600ft off the deck. Obviously, climbing on a top rope isn’t the same as soloing exposed 4th class terrain, but it is something to help put perspective on your climb.

4. Starting out over-prepared sometimes means you end up plain old prepared. Self sufficiency is a cornerstone of mountaineering and should always be the primary goal. I actually didn’t expect to be in the situation we were almost in, but I did think about it as a worst case scenario. In the end, it saved us a call to Ray Brook for DEC assistance off the mountain.

5. While rock shoes could certainly be justified for the crux pitches, I’m inclined to think a good pair of sticky rubbered approach shoes could be better provided you are experienced at climbing slabs and slides. This is because you often travel between wet moss and mud, followed by dry steep rock slabs. Switching shoes is impractical, but often a rock shoe isn’t right or a boot isn’t right for the terrain.

6. Do not underestimate slabs/slides. Unlike vertical or overhanging rock, they tend to not discriminate based on the climbers BMI (fat factor), but they require complete and total trust in your sticky rubber shoes and footwork. No pulling jugs, no false sense of security as you strong arm your way up. They are in a sense the perfect starting point for technical climbing, as they force novice climbers to realize how important the feet are in ascent. Climbing is often thought of as a world of upper body strength, but the reality is good footwork is the foundation to all

7. Exposure changes the game. A lot of trails in the High Peaks have similarly steep slabs but with only a 10 or 20ft fall potential. Looking down at 100-400ft or more of unbroken fall is a game changer in terms of mentally conquering the climb. Anyone planning a slab or slide climb should really consider their own tolerance for exposure before committing to a long climb.

8. Rock shoes, helmets and ropes. Whiteface Slides are steep enough that knocking rock loose could be a problem, however, the helmets actually helped with the bushwhack. Necessary? Debatable, but probably not overkill if your group isn't being careful to check for loose rock. Rock shoes (or sticky approach shoes) on the other hand were pretty much a requirement. The slides are seemingly polished, and the extra traction is never a bad thing. Ropes and harnesses, and the ability to use them can keep things from getting out of control.

Slideshow of additional images from the 2011 slide climbs on Whiteface Mountain. All images with Pentax K-5 DSLR and DA 21mm Limited or FA 43mm Limited lenses. 


Saturday, September 24, 2011

Taking Dix from both ends can leave you with a Whiteface!

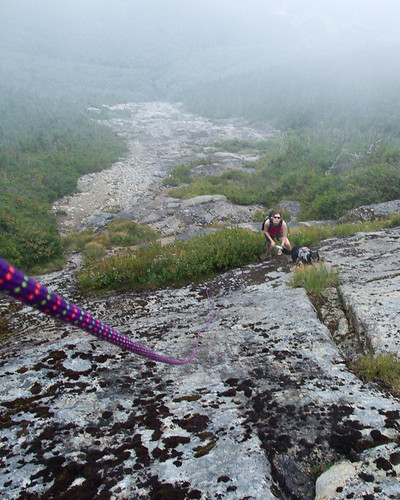
Aim ascending Whiteface Ski Slide #1

Following our removal from the Dix Wilderness by the DEC, we had to find alternate plans for the remainder of our vacation. Slide climbing had always been on the agenda for the second half of the trip, so with 3 major slide filled wilderness areas closed, my eyes turned to Whiteface.

Approaching and descending from a ski slope would seem to be easy. As you drive by them on the road you see grassy fields that look like a pleasant way to ascend and descend a mountain. Perhaps Whiteface is different than other slopes, but it was anything but a leisurely walk.

The ascent was fine. We actually took the Stag Brook Trail -lower and upper- which gained about 1500ft or so. This was in the trees, on a trail parallel to the beautiful rushing Stag Brook with it’s numerous waterfalls and cascades. I don’t know if Stag Brook is typically dry in summer, my guess is that it normally doesn’t flow quite this much. But following hurricane Irene, it was quite full and beautiful.

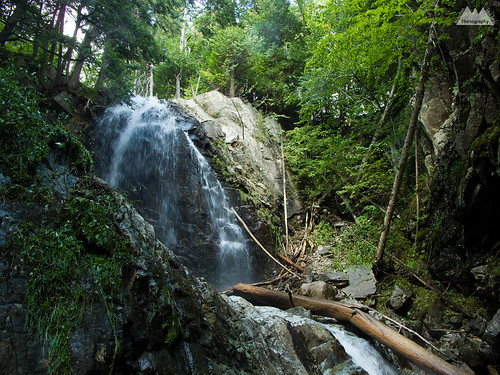
Stag Brook Falls

At the top of Stag Brook trail, we began the ascent via the ski slopes. Immediately the 80+F (26C) heat with high humidity became an issue. Mid summer heat and humidity in September, on a shadeless open slope = fun times.

Understanding why you ski down them!

The slopes are actually quite pretty, many wildflowers and butterflies to be seen during the ascent. We could also see our objective quite clearly. Both the summit of Whiteface and the slide bowl -or as my wife refers to it, the hell hole.

It was about 4pm when we finally got to the base of the slide. Slides 1 and 3 are immediately visible in the bowl. Just bear left and start up #1, #3 is slightly to the right (center). #2 two splits near the upper half of #1, and #4 appears to require some bushwhacking to gain the base, but nothing heinous. My next trip here I will be doing Ski Slide #3 and then traversing over to Ski Slide #4 to summit via the crux pitches of #4. For this trip though we just did the easiest of the four, #1.

The slide was relatively dry as a whole, but there were many wet sections and many streams of water flowing down. Mixed in were a few slimy sections. For this reason we zig-zagged around a lot of the slide seeking the driest terrain versus the easiest terrain. Typically, I look for the harder climbing on class 2, 3 and 4 terrain to make things interesting, but this time we ended up on steeper and drier sections because of necessity. Oddly, I usually feel like the climbing is easy, but on this slide I felt like it was steeper and more dangerous than the trip reports suggested. I might be getting soft, or I might just have been concerned about Colvin.

A concerned Colvin watches the ascent

Colvin climbed the class 3 slide with relative ease, but because of his extreme concern and loyalty for us, he put himself in dangerous positions several times by returning down from difficult sections to “assist” or encourage us. There were 3 sections where I roped Colvin. He was wearing his Ruff Wear Doubleback technical climbing harness, and I used a hip belay and 8mm static cord to give him a little assistance over some fairly steep sections that were above significant runout. In these sections, I felt a fall could become dangerous beyond the initial impact. It’s quite funny, really, but he is very comfortable climbing while roped. Whereas my last dog, Caney, who was a much better climber, almost human good on technical terrain, did not like being roped up.

Final ascent before bushwhack
The mental crux of any of these longer semi-technical climbs is the exposure. There are sections of trail throughout the Adirondacks with slabs this steep, or even steeper, but few involve looking back down at hundreds, or even 2000ft, of unbroken fall beneath you. There were few sections on this slide where there was potential for fall for even a novice climber with a grasp of fundamentals, but if a fall were to happen, it could be fatal. I would say that if you were to fall on the first 200-300 vertical feet of the slide, you could potentially fall all the way to the bottom without stopping depending on your path during the fall, though more than likely you would stop. The higher up you got on the slide, the less steep it became. In many spots any sort of significant fall was near impossible, and it was just like hiking any steep, slabby trail.

Climbing the slabs - Whiteface Ski Slide #1
Falling on a slab climb or slide is actually quite serious. More serious in my opinion than a beyond vertical rock climb with good protection. When you fall it’s not a matter of if you will hit something, but how far you will slide before you stop. Skin and rock don’t mix well. Even a minor fall can lead to weeks of healing. That said, I’m a confident, and I hope, a good friction climber, slabs have never bothered me, and I enjoy climbing them. Generally speaking, people either love or hate slab climbing. There is no middle ground.

The left side of slide #1, though not extreme left, is more ledgy with verticalish steps of 3-10ft. Staying towards the center is more a mix of ledges and slab, while far right is mostly smooth slab. In dry conditions, the right side seems like it’s the best route for friction climbing. In wetter conditions, the center left gives a nice mix of rest ledges with secure stances, dry friction, and good positive holds.

The extreme left, which would be on the treeline, is very wet, muddy and also slimy. I would not consider this an option unless it was already raining and you were using the trees for assistance. Even then, you might be better off towards the center or right sides.

While the easiest of these slides are really glorified hikes, and the hardest are technical rock climbs, I’d recommend people have some climbing experience before undertaking them. Also, I see a lot of hikers bring ropes with them while hiking, but few actually know how to use them. Figuring out a rope 750ft off the deck of a slide really isn’t the ideal place. Though I brought a rope, I did not bring human harnesses. I could have made a diaper harness from the webbing I had, but I think it’s a good idea to have harnesses for novice climbers and 100ft of rope, along with some webbing. Coincidentally, I did notice an old sling with a rappel ring on tree that had long since washed away. Apparently someone either descended the slide or got sketched and bailed on it.

Clouding In

When Aim, Colvin and I reached the top of the slide we were on the right side of the slide. We were greeted by a wet 15ft slab of about 45*, which was above a 5ft shelf. We scanned for a herd path before committing to the upper section but did not see one. I climbed the crack to avoid the slab itself, then I belayed Colvin up the slab. The left-center looked easier, like it went further into the trees, but it was also wet and I preferred the safety of the crack system in the slab above us.

The best part of slide climbing, the bushwhack!

Once at the scrub line, we did a quick check for a herd path of any sort. One could not be found. Knowing Aimee’s desire to be done with the slide and get to the summit, I let her forge a path through the cripple brush. About 10 long minutes later, we climbed the last 150 vertical feet to the power cable path, and ascended to the summit station. Having escaped any sort of injurious behavior on the ascent to this point, I promptly fell into a crevice while entering the tourist section of the mountain.

Thanks for the reminder!

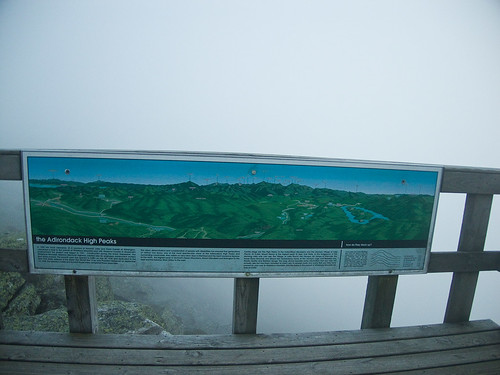
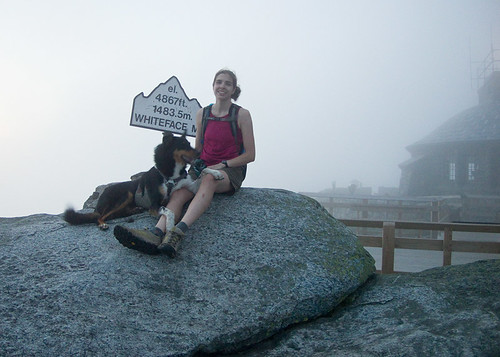
The summit of Whiteface had been in the clouds for some time while we were on the slide. When we reached the summit things hadn’t improved. Views were 20 feet tops and the sun was just about to set. A few quick summit photos and then we pulled out the map. I took a compass bearing for the ORDA trail we planned to use for descent. In hindsight, this wasn’t necessary, the summit station viewing area is marked with direction markers for tourist to use when viewing the distant mountains. However, the only other time I’d been to the summit of Whiteface was skiing to the top in the winter and I had no idea where the trails were, as the ski route simply goes up the summer tourist road. Better to be prepared while in shelter than dealing with a map in 30 mph winds and fog. We headed south for the ORDA trail, pretty quickly we spotted yellow blazes, and were on the ORDA descent trail.

Aim and Colvin on the cloud covered summit

All I can say about the ORDA descent trail is HOLY $h!%!!! Wow! I was expecting some sort of paved tourist descent to the ski lifts, but this trail was in fact steep and interesting. It even had ropes set up to lower yourself down at least 3 sections. Though only one was really necessary.

Whiteface Slide #1

Unfortunately, this was the end of the interesting part of the day. Descending down the ski slopes in complete darkness, strong winds and occasional fog was interesting only in that we were not able to just plunge down the steepest slopes for a rapid descent. Having my mini headlamp, clearly anticipating a shorter day, I couldn’t see more than 30ft, so we took the longer moderate ski trails towards Little Whiteface, and then began a direct descent from Little Whiteface. (Coming back a few weeks later, I could see just how steep Niagara was, and was glad we didn't plunge down it's slabby decent).

Along the way, we crossed paths (literally) with a porcupine. While that was exciting in a horrific train wreck sort of way -we hate porcupines- the highlight of the knee busting, ankle twisting, back aching, filling loosening, brain jarring descent was seeing what I believe was a Fisher pop up in the grass about 50ft from us. His tightly spaced eyes and head movements led me to believe he was a predator, most likely a cat or weasel. He was directly downwind from the porcupine, and my guess he was hot on that bully of an animals tail...or rather head. 25 head bites later, that porcupine was going to be Fisher dinner.

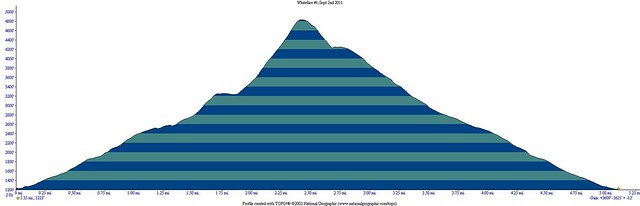
The descent went on forever, and finally at almost 9 hours into the day we arrived back at the car. I’m not sure of the total mileage, but I’d guess it was only about 6 miles. The total ascent/descent was 7500ft, which equates to well over 1000ft per mile. What really took so long was the ankle breaker scree on the ski slope descent. It was like walking on baseballs placed neatly on top of golf balls. That night and the next day, we felt like we’d done three times that distance. Even Colvin slept most of the next day. I’ve done 20 mile, 12,000ft gain and loss hikes this year and barely been sore the next day, so I was truly surprised how punishing the ski slopes were!

Whiteface Slide #1

All in all, it was a good day and a great adventure. Add this to your options for life outside the High Peaks Wilderness, but do yourself a favor, trust me on the ski slope brutality and figure out another way down the mountain! Even if you have to carry a sledge hammer to the summit to break your own femur with and call for rescue, it will be better than descending the ski slopes!

Monday, September 12, 2011

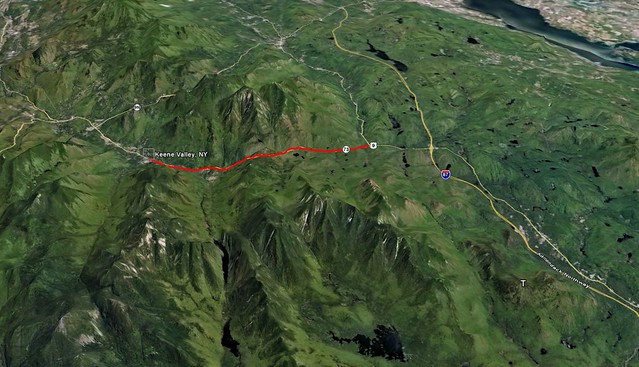
Route 73 from Exit 30 to Keene Valley is now open

Route 73, linking Keene Valley to the Northway (I-87) is now fully open. Initially only a single lane was planned to be open within 10 days, but the DOT, Governor Cuomo and private contractors put together an amazing feat and came out way ahead of schedule. Truly amazing based on the photos and descriptions of the level of destruction to Route 73.

Based on business numbers while the roadway was closed, it appears Route 73 truly is the lifeblood of Keene Valley. Business owners reported a 75% loss in business. However, this could also be attributed to the Adirondack Forest Preserve's; High Peaks Wilderness, Giant Mountain Wilderness and Dix Mountain Wilderness all being closed for much of that time. These happen to be 3 of the most popular wilderness areas in the park for 4 season recreation and contribute immensely to the local economies of surrounding hamlets. The Forest Preserve contributes over $1 billion yearly to the New York economy.

Full press release from Andrew Cuomo's office available here.

The red line on the map below outlines the section of Route 73 heavily damaged by Irene and now reopened to the driving public today. Good news, indeed, for leaf peepers, hikers, peak baggers, rock climbers and ultimately the business owners who benefit from the tremendous variety of recreational activities in America's premier weekend wilderness!

73 to KeeneValley

Thursday, September 8, 2011

Images of the the aftermath of hurricane Irene on the Adirondack High Peaks and John's Brook Valley

I highly advise anyone with some backcountry aspirations to take a look at the destruction -and in some ways, improvements- to the Adirondack backcountry as seen through the lens of Brendan Wiltse.

Some great photographs of the damage in an area not yet open to the hiking public: Hurricane Irene damage to the Adirondack High Peaks, John's Brook Valley Region, including several new slides along existing trails.

I say improvements because anyone that has hiked the Orebed trail will certainly appreciate it is no longer a steep, slick, slabby tree tunnel, but it now has some views and the trail is more like a true slide climb than an eroded hiking path. I always hated that trail, even more so when the ladders were missing this spring and early summer. Sadly, the Adirondack Mountain Club Pro trail crew was putting in new ladders just before the storm. Much of their work destroyed and mixed in with rubble from the slides.

Oddly, while a lot of damage was also done to lowland approach trails that is not good, the potential new routes up slides, and the opening up of the terrain on existing trails actually looks like it is a long term benefit. It will be interesting to see first hand just how different the views are off the mountains of the Adirondacks.

Also from Brendan's blog:

Wednesday, July 27, 2011

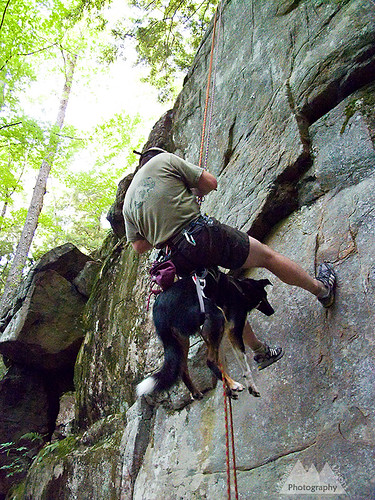
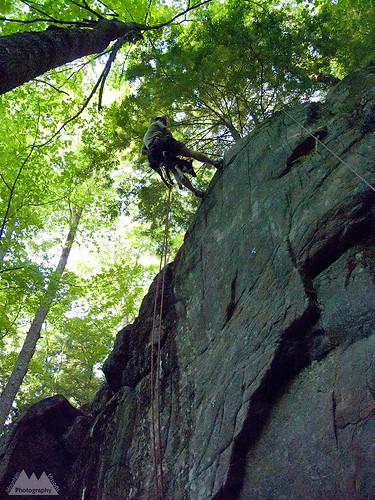
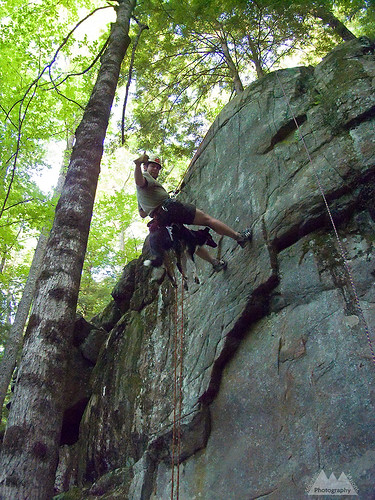
K-9 on Rappel

K-9 on rappel

Scared shitless, that would be a good way to describe this. Of course, you are thinking, why the hell would you torment your dog. No, I was scared shitless. Looking down at my harness was a clusterfuck (a climbing term for a mess or log jam) of epic proportions. The only other time my belay loop/tie in point has ever been that busy was while aid climbing. The big difference between this and aiding, Colvin isn't aiders or a haul bag.

I'd planned this day for a while, starting back last Autumn when I re-purchased the Ruffwear Doubleback technical harness. Petzl used to make such a harness, for a fair price at that, then one day they stopped. A fairly recent addition to the Ruff Wear catalog, the Doubleback is the only harness not designed specifically for the needs of search and rescue or SWAT dogs. It's designed to be worn at all times, with hide-away leg loops and a strength rated tie-in point. It's basically a recreational climbing harness for your dog. In theory you could use it as a standard trail harness, but the chest pad and need to "double back" the threaded straps would make it highly inconvenient, and possibly uncomfortable for the dog. Colvin wears his only when I think I might need to rope or haul him.

We used the harness a few times this winter on semi technical terrain, and also hoisted Colvin in it to test the fit and rigging. Outdoors we used it in the Northern Presidential's, on terrain that is often underestimated by novice mountaineers and experienced hikers alike. If the terrain calls for an ice axe and crampons, roping the dog should be a serious consideration. While SAR comes out pretty quickly for humans, I'd prefer not to find out they won't come to rescue a dog. So being extra cautious is important. With this in mind, I practiced short rope techniques with Colvin on a short rope belay. The short rope wasn't really needed due to the conditions not being as snow covered as potentially possible. Still, it was good opportunity to test and refine a technique for more technical terrain when necessary.

I'd taken Caney, my previous trail dog, on the North-South Arapaho traverse (class 3-4/5.0) and up and down various glaciated peaks via snow climbs and scrambles around Lake Isabelle and Triangle Lake in the Indian Peaks; on Central Gully on Mount Washington (WI2, mostly snow), and on various slides, slabs and 4th class scrambles in the Adirondacks. So I know these dogs are capable of going places many choose not to take a dog, but I also know this all comes with a greater responsibility on me. Not only am I responsible for myself, I am also responsible for the dog on very challenging terrain. Practicing under controlled circumstances is the best way to assure everyone is safe.

My ideal test place for our first rappel was someplace quiet, secluded, without other climbers. Also preferred was a slightly overhanging face or a free hanging rappel, with high fixed or natural anchors at the top. The Gunks would have done the rock portion of my requirements quite nicely but finding solitude isn't always easy. There was a good chance Colvin would be squeaking and squealing, which he did, as we went over the lip of the cliff. The last thing I wanted to deal with was the cacophony of beta spewing climbers giving unhelpful advice.


K-9 on rappel

Though not well known nationally -due to being in the shadow of the Gunks- the Adirondacks have an immense amount of high quality technical rock climbing routes. And unless you seek out a crowd (the High Peaks roadside options), you will rarely climb with other people. 2,000 routes on 260 separate climbing areas 82 of which offer multi pitch climbing, all spread out over nearly 4 million acres of public land. For this project, Carl's New Baby, a bolted 5.10b on the Hudson River was just perfect.

Petzl Stop. Image: Petzl.com
Safety came in the form of 2 independent but equalized tree anchors about 5 feet from the cliff edge. There was nice clean rock before and over the lip. Aim backed up the first rappel with a top-rope belay topside. The second two rappels she only belayed me over the lip, where the best chance of something going wrong was. In the future I'd probably use a Petzl Gri-Gri, a Petzl Rappel Rack, or perhaps best, a Petzl Stop descender. If nothing else I'd add a carabiner to increase friction.


Petz Rack. Image: Petzl.com
Nevertheless, it took me a while to get everything to where I wanted it, or rather was comfortable with it. Not only was it about being safe, but also making the rappel as comfortable and smooth as possible for Colvin. A bad experience the first time could have left him unwilling to do it again.

Looking at all the anchors (3 in total, two ropes, multiple attachments) it was beginning to look overwhelming. After double, triple, and finally, quadruple checking everything I just said it, "I'm pretty nervous, my heart is pounding." A dog can sense your level of anxiety, and I was hoping to not have been that nervous. Colvin was already attached to my harness, I lifted him up and carried him to the edge, leaned back on my anchor and we were rappelling.

Once the instinct to grab the cliff for dear life was exhausted, Colvin, as with most dogs, gave up and became very calm and still. No squealing, no whimpering, no barking, and no flailing. I'm not sure he was relaxed, it's more a submission than anything, but my anxiety was gone after a few feet of descent.

During the first rappel, Colvin was attached directly by a single locking biner to my belay loop. I've seen this method used by SWAT and fast rope teams, however, he didn't hang far enough down and removing him from the harness was difficult once we touched down. I'd say this method would be better, if I went directly through my rappel biner while on lower angle terrain. Keeping him high on low angle terrain would keep him from bouncing into the rock.

For the second rappel, I used a tripled shoulder length alpine draw, with lockers on both ends to attach Colvin to my harness. I stabilized his rear leg loops with a 4 foot sling that I shortened. The rear loop tie-in isn't required and it's not truly a functional tie-in. What I mean is that it doesn't enhance safety, it's about comfort.  This setup worked pretty well and it seemed like he was in near perfect position, perhaps a few inches lower would have been ideal.

By the third rappel, I was having fun. The anxiety was gone, Colvin was doing awesome, and the setup was just about perfectly refined. Again, I had Aim belay us but just while we were getting setup on the edge. Once we were on the rappel rope and anchor, she was free to take the belay off and snap a few photos.

Aside from not having time to actually climb, it was a hell of a day.

K-9 on rappel

Thursday, July 21, 2011

Can I See Your Papers, Finding the Ultimate Trail Dog Is Easier Than You Think

After 9 Years Of Dedicated Service, A Hard Day At The Office
Caney, a shelter rescue, on the hike out after 3 days of ascending the most technical trails in the Northern Presidential's.


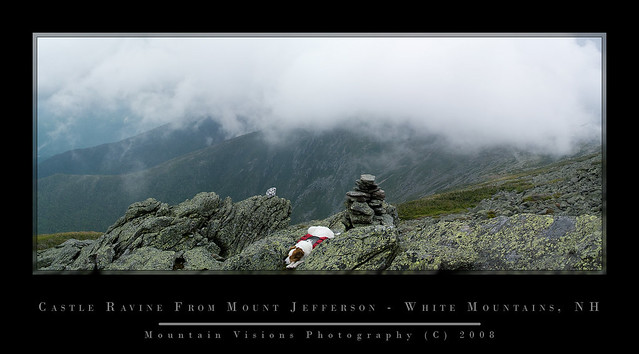
Recently, while checking a forum for my lost trekking poles, I noticed someone asking where they could buy a Chocolate Lab to share their love of the trail. Everyone has their reasons for doing different things, but there is almost no way to justify buying a Lab from a breeder. This is one of the most over bred and common dogs available. Everyone loves Labs, big, lunky, dumb but highly trainable, lazy and loyal. The best trait of Labs, in my opinion, is they are a good dog for weekend warriors. They are content to lay around all week, but will hike/swim till either you stop, or their paws fall off on weekend outings.

Beyond that, there is entirely no reason to buy a "trail dog". The majority of trick dogs, agility dogs and even Search and Rescue  (SAR) dogs are shelter dogs. As a matter of fact, it's arguable SAR dog training is probably the most mentally and physically demanding of all dog training...hiking an average Class 2-3 trail should be cake for the average dog! Exceptional dogs should be able to climb 4th and easy 5th class, but I have yet to see a breeder advertising climbing dogs.

Health, durability, and breed specific traits:

It used to be believed that purebred dogs were healthier and more prone to living long lives. However, it's now widely accepted that mutts are healthier. There is a simple reason for this, Darwin's theory on natural selection and evolution is clearly at play in mutts. Recessive genes are weeded out quite quickly as weak animals die before they are able to reproduce. Not to mention, no one is breeding sickly mutts, but many home breeders and puppy mills do breed weak and sickly pure breeds. They then sell them off to unsuspecting neophyte dog enthusiast. They are able to sell these dogs because of a precious (yet entirely meaningless) AKC lineage paper, and you are stuck with an awful dog that probably will end up in a shelter or dead on the street. The best "trail dog" in the world is probably in a pack of strays on some Indian reservation in the Dakotas. So if you care about durability and longevity, head out to the reservation and get you a stray!

Unless you are a show dog trainer, or you need a dog to perform a very specific task, or perhaps need a hypoallergenic dog, there really is no reason to buy a dog. Just because a dog has it's "papers" doesn't mean it has good traits or will be a good dog. For instance, not all Border Collies have a strong herding instinct. And believe me, if you live in a suburban neighborhood, where the only thing to herd are kids and cars, you do not want a dog with this instinct. However, if you are a rancher, you probably do want that very same dog.

Most people breeding aren't breeding traits, they are breeding breeds! The best breeders don't sell dogs for $50, $100, 200, 500, $750, etc, these dogs are $1500-2500 or more, have just one litter a year, and they are dogs with winning heritage at some aspect of their breed, whether herding, working, protection/law enforcement, etc. These dogs aren't being bred for their looks, rather they are bred because they have a strong pedigree of traits or physical prowess.


So where am I'm going with this? It's simple, you should never buy a dog from a pet store, puppy mill, or home breeder, because there are millions more dogs in this world than people to take care of them. Buying from home breeders just encourages breeding. And it's not the breeders fault. If I want to make a few thousand dollars extra a year, I might consider buying 2 "pure bred" Border Collies with papers and breeding them. You say, "if they are already born, it's not hurting anyone to buy them." Yes it is. It's enabling. If you wait till those puppies hit 6-9 months, chances are they will be in a shelter or given away for free. A few litters later those breeders start to lose interest in losing money on shots and feeding, they eventually toss in the towel.


Pros of getting a shelter dog:

1) Puppies are cute, they have to be or we'd probably kill them for all the havoc they wreak. Most shelters don't have "true" puppies, and that in itself saves you from a lot of expense! A lot of these dogs come vaccinated and neutered, saving you time and money! Shelters that do have real puppies usually adopt them out before they are even born; sight unseen. We were at one shelter where a woman was taking the train and then a cab from NYC, 4 hours upstate to claim her puppy. It's crazy, and should tell you how dumb it is to be puppy crazy.

2) Getting a young non puppy or adult dog has it's advantages. You can often get a good idea of the temperament of a 6 month old dog or a 5 year old dog, but puppies are very tough to figure out for the novice dog trainer. By getting an older dog you also won't end up with an adorable puppy that turns out to be a not so cute adult dog. Remember #1, we tolerate puppies because they are so darn cute, once they are adults that puppy cuteness has worn off. When we were looking for a new dog, my wife kind of wanted a puppy, but I just looked at them and wondered how they were gonna look, how their temperament was going to be; and most importantly, how many extra months it would be till they were ready for some real training.

3) Pound puppies are rarely problem dogs, many came from good homes that cared for them but were forced to give them up. Allergies, money, living situation, death, or change of careers are all non problem dog reasons why some dogs end up in shelters. Besides, you don't want to hear my tirade that problem dogs are the result of problem people, do you? A lot of adult shelter dogs are house broken to boot. And lets face it, training a dog can be fun, but cleaning up accidents is never fun!

4) No one will ever ask you for your dogs "papers" on the street, but if you must have a specific breed, there are many breed specific rescues. Dogs at these rescues are evaluated for temperament and health, and then they are matched to good homes based on an extensive application process. In a sense the breed specific rescue is what a real breeder would do. Analyze traits and temperament and match them to the needs of the buyer. Of course your local shelter probably has a few of those puppy mill purebreds to. One more thing "rescues" do like a real breeder, if at any point you decide the dog isn't for you, they will take it back. Yes, real breeders will take your dog back without question, so do rescues. Try that at the pet store, puppy mill, or home breeder!

5) You are doing a good thing for several reasons. You are rescuing a dog that could be put to death, you are opening a space for another dog at that shelter, you are not giving puppy mills and amateur home breeders profits to continue to over breed. I'll state this again, if you buy from a puppy mill or home breeder, you are the problem!

6) Think about the money you are spending to buy a "pure breed", now think about the millions of dogs in shelters. If you rescue a shelter dog, you could donate the money you saved paying a breeder to keep more shelter dogs alive. Shelters aren't free, there is no such thing as free medical care, and dogs do get put to death.

7) Within a few months of spending time training and playing with your new dog, teaching him/her how to hike, swim, behave in a boat, climb up ladders and rocky trails, etc, you will not care one bit if it's the breed you thought you wanted in the first place.

Cons of getting a shelter dog:

The biggest reason I can see for buying or seeking a specific breed is getting the best likelihood of the traits you prefer in a dog. The problem is, part of the dog expressing those traits is the way it is trained and nurtured. Buying a specific breed guarantees nothing, it only increases your chances. If you buy a dog from parents of the finest trail dogs in the world, and lock it in a closet for 3 years, good luck on the trail! However, as expressed above, unless you are buying from a top breeder who specializes in the traits you desire, you are always playing Russian Roulette.

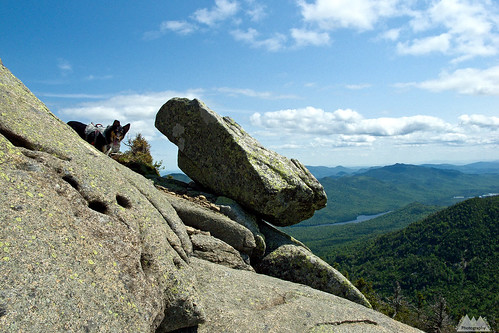
Colvin on the south summit of Saddleback
Colvin, a shelter rescue, on the south summit of Saddleback Mountain. The trail that was ascended to this point is considered by many the most technically difficult in the Adirondacks.

Where to rescue from:

There are many options. With the Internet you can literally browse dogs from all over the country and have one shipped to you for a reasonable fee. Colvin cost $175 to ship from Arkansas, which was a very fair price. The South typically has more rescues than the North. In combination with lower human population, lower spay/neuter compliance, and more kill shelters, they will often ship dogs up north to keep them from being euthanized. Many rescues and shelters will send you videos of the dogs you are interested in, as well as additional pictures. They will cat, dog, kid, leash, and car test. They will do almost anything you need them to do to make sure it's the right dog for you. They'll even take the dog back if it's not the dog for you. This is also something a top end breeder will do, but not a puppy mill.

It's kinda funny, really, these people (rescues and shelters) will bend over backwards to get you the right dog, but instead many people will play Russian Roulette with a "pure breed" from the equivalent of a shady used car salesman! Does that make sense?

The beauty of all of this is, while you are doing a really good thing, you are in many ways getting a more customized dog than you would have gotten had you bought a puppy for $500 from the woman down the block at 6 weeks old.

If you've been offended by any of this post, well, the truth is ugly, but it's the only way to combat a serious and somewhat solvable problem.

Keep an eye out for some guidelines to selecting and training a trail dog in a future blog post. I'm no expert, but you'd be surprised at how many people get a puppy and toss a 15lb pack on it's back, then head off to hike the Great Range, without any thought to the undertaking.

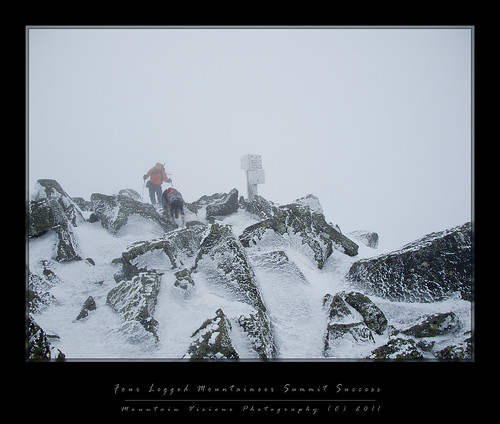
Four Paws on Adams: Winter Mountaineering in the Northern Presidential's
Colvin, a shelter rescue, leading the way up the summit of New Hampshire's Mount Adams under full winter conditions. Despite dozens of humans attempting, he was one of only three total individuals to summit on that particular day.

Tuesday, July 19, 2011

Mountain fit vs. gym fit, functional fitness at it's core

First off, I’m neither. I have no identity crisis. However, I’ve had a few opportunities over the last few months to hike with people that were either gym fit or mountain fit. And even in my relatively poor conditioning (mostly my BMI, I’m actually in pretty decent trail shape at this time), I was amazed by the difference between being functionally fit (trail fit), and looking good (gym fit). 

One of the biggest areas that that gym fails is at proprioception. It’s a word tossed around after major connective tissue injuries, brain trauma, or reconstructive joint surgeries, by physical therapist and surgeons. But it’s something that you need even when healthy. You never gain sport specific proprioception at the gym, no matter how good your gym fitness.

Don’t get fitness confused with proprioception, which is basically your body being constantly aware of it’s positioning. For example, your knee knows without you actively thinking about it that it is at maximum extension, thus you don’t hyper extend your knee. Your ankle knows where it’s maximum roll point is before you trip and fall, or worse twist and tear ankle ligaments and then fall. Slightly more complex, your quadricepts muscle knows when it should fire in relation to your hamstring muscle, a simple action that allows you to walk, run and sprint without injury. 

Often you’ll see backpackers on the trail who could probably lose 15-30lbs, yet they are able to hike 15-20 miles and gain thousands of vertical feet with a 40-50lb pack, without batting an eye. They somehow don’t get injured or look uncoordinated, though everything you know about fitness and performance says they should.  You could certainly call these people functionally fit. You put that same 50lbs on your standard urban gym rat and you are going to be in for a long day. As a matter of fact, that 50lb pack has a better chance of injuring that specimen of human kinesiology than someone who is has developed functional trail fitness. 

On Independence Day weekend, I had the honor of hauling 60-70lbs of climbing gear on some short hikes, while my wife and sister carried Camelbak half day packs, and my little brother and sister just carried 30oz Camelbak reservoir packs. The kids are only 8, so they get a pass. Though my little brother Om is a natural mountain goat. My wife gets a pass because she’s just lazy. My sister, Heather, on the other hand spends many hours a week, I’d guess in excess of 8-10, working out at the gym or similar activity. She looks extremely fit, but she struggled with many basic camp/hike daily task. Pumping and carrying water to the campsite seemed like it was going to break her. Yet she probably tosses 25lb weights like feathers at the gym. 

Someone reading this is going to call a bullshit on my 60lb pack claim, but I’m being conservative. The pack easily felt heavier than my multi-day overnight winter packs with technical winter gear. Here is the bulk what I was hauling: 2 60M dynamic ropes, 100ft of 8mm cord, ½ rack (passive gear; nuts, tricams, hexes, and a few mid size cams), 100ft of webbing, 5 harnesses (yep, lazy bastards couldn’t even wear their harnesses), 3 pairs of shoes, helmet, first aid kit, 1.5 L water, lunch, snacks, a camera and a hefty guide book. Since we had 5 people, the idea was to set up two ropes at a time and pair off. 

Enough about my Sherpa load, back to my gym fit sister. I’m not busting on my sister, the last time I was that gym fit was the summer of 2005 when I was at my pre college weight. However, this was with one big exception, I was also trail fit. At that time I was able to haul 65lbs over the continental divide in rotten waist deep spring snow on multi-day backpacking trips.  I was hitting the gym 2 times a day several days per week and hiking long days on weekends. But looking at my sister strain, struggle and just not seem to have the energy, reminded me that hitting the gym isn’t necessarily going to give you sport specific strength or endurance. It certainly won’t give you the body control and proprioception needed in the mountains. 

The problem with the gym is that it isolates muscle groups. While this can be good for overall strength and joint protection; and I’m quite certain it prevented my knee(s) from being destroyed in 2006 when I fell on the Trap Dike and merely had a 40% tear of a single ACL, it isn’t something that conditions you for the sports you are playing.

My specific sports these days are backcountry travel. This might mean being on skis, snowshoes, in a canoe or kayak, climbing vertical rock and ice, or merely lacing up the boots and putting a pack on my back and covering distance and elevation. 

As my sister and wife needled me during the short but steep .6 mile and 550ft up Owls Head, I wasn’t too happy, but at the same time I was ok with hauling the gear. Why? Getting trail fit involves three things: 1) building endurance 2) building power/strength 3) building cardio fitness. 1 and 3 might seem the same, and perhaps if you are running 20 flat miles it’s similar cardio output to gaining 5000ft, but the reality is they are completely unrelated, at least initially. Since these hikes to the base of our rock climbs were short, they were a good distance to overload my pack and build some strength and cardio fitness.

When I’m climbing a 20-30% grade with a pack on my back, my heart is pounding very similarly to when I’m running sprint intervals. My legs need oxygen and thus blood and they are taxing my heart and lungs to get that oxygen carrying blood as quickly as possible. At the same time, any living human without some serious health concern can hike 20 flat miles in a day without serious consideration. Your heart will never work very hard if you keep a moderate pace. Try keeping your HR down on an ascent, you’ll never get to the top! This why endurance and cardio fitness aren’t necessarily the same. 

This winter, I had the power phase taken care of, but I’d bonk after 5-6 miles under the load of a winter overnight pack, and my cardio fitness just wasn’t there. I remember being in the Presidential’s and simply hitting a wall about 2500ft into a 3000ft ascent, while my older but more trail fit partner pushed ahead. I underestimated my fitness. I had been day hiking with a loaded winter day pack, but I wasn’t hauling more than 30lbs. 60lbs is a lot different. A day later we were summiting with daypacks on semi technical terrain, and I was perfectly fine again, leading the way and setting a good pace. 

Fitness equals safety in the wilderness, but it also equals fun. To be mountain fit you need have all three of the above, but ideally change only a single variable at a time while getting there, slowly over time. Because I’ve been disappointed in my winter conditioning the last 2 winters, a season which in this part of the world is unforgiving on the unfit, this spring I began working on the endurance aspect. I started out hiking 15-20 mile days with a day pack over moderate terrain. Then I added some weight to the pack and even did a little backpacking over similar terrain. New boots and associated blisters slowed down the backpacking. This was OK, I didn’t intend to backpack much, I typically don’t backpack over the summer because of heat, water and crowd considerations. Following that I started adding big elevation days with the daypack, and much rougher terrain into the mix. When the cooler weather of the fall comes, I’ll start backpacking again, adding strength and power into the mix. 
 
I can’t stress enough, that while being in great shape is always a great head start to being in sport specific functional shape, it CANNOT replace actually training in the mountains. As my partner in the Presidential’s noted and my other partner on Mansfield, a steep 3000ft descent with a 50lb pack isn’t necessarily much easier than the ascent was. Descending takes body control, muscle fitness, and strengthening of muscles that the gym just fails to train those muscles or teach body control.

The moral of the story is, be in shape regardless of how you get there. But don’t expect to translate leg pressing 700lbs into ascending 7000ft in a day. Don’t expect to translate back extensions, situps, and shoulder presses into carrying a 60lb pack over rugged terrain. Don’t expect the treadmill and eliptical to translate into cruising up a mountain. 

Most of all, the worth remembering lesson is, carrying a 60+lb pack is always gonna suck, but if you want to get really trail fit, it’s a lot better workout than mindlessly chugging away on the hamster wheels at the gym.  I’d personally rather life suck in the mountains than at the gym! Pine smells a lot better than the sweaty fat guy (that would be me) next to you, pounding away on the “deadmill” like a pack of buffalo. The best part about the 60lb pack was that it was the last pack load I carried till the following weekend. And when I picked up my 20lb full-day pack and did a 15 mile hike on the Adirondacks Great Range, it felt like a feather!